- Locate your Microsoft Entra ID Tenant ID
- Go to https://entra.microsoft.com.
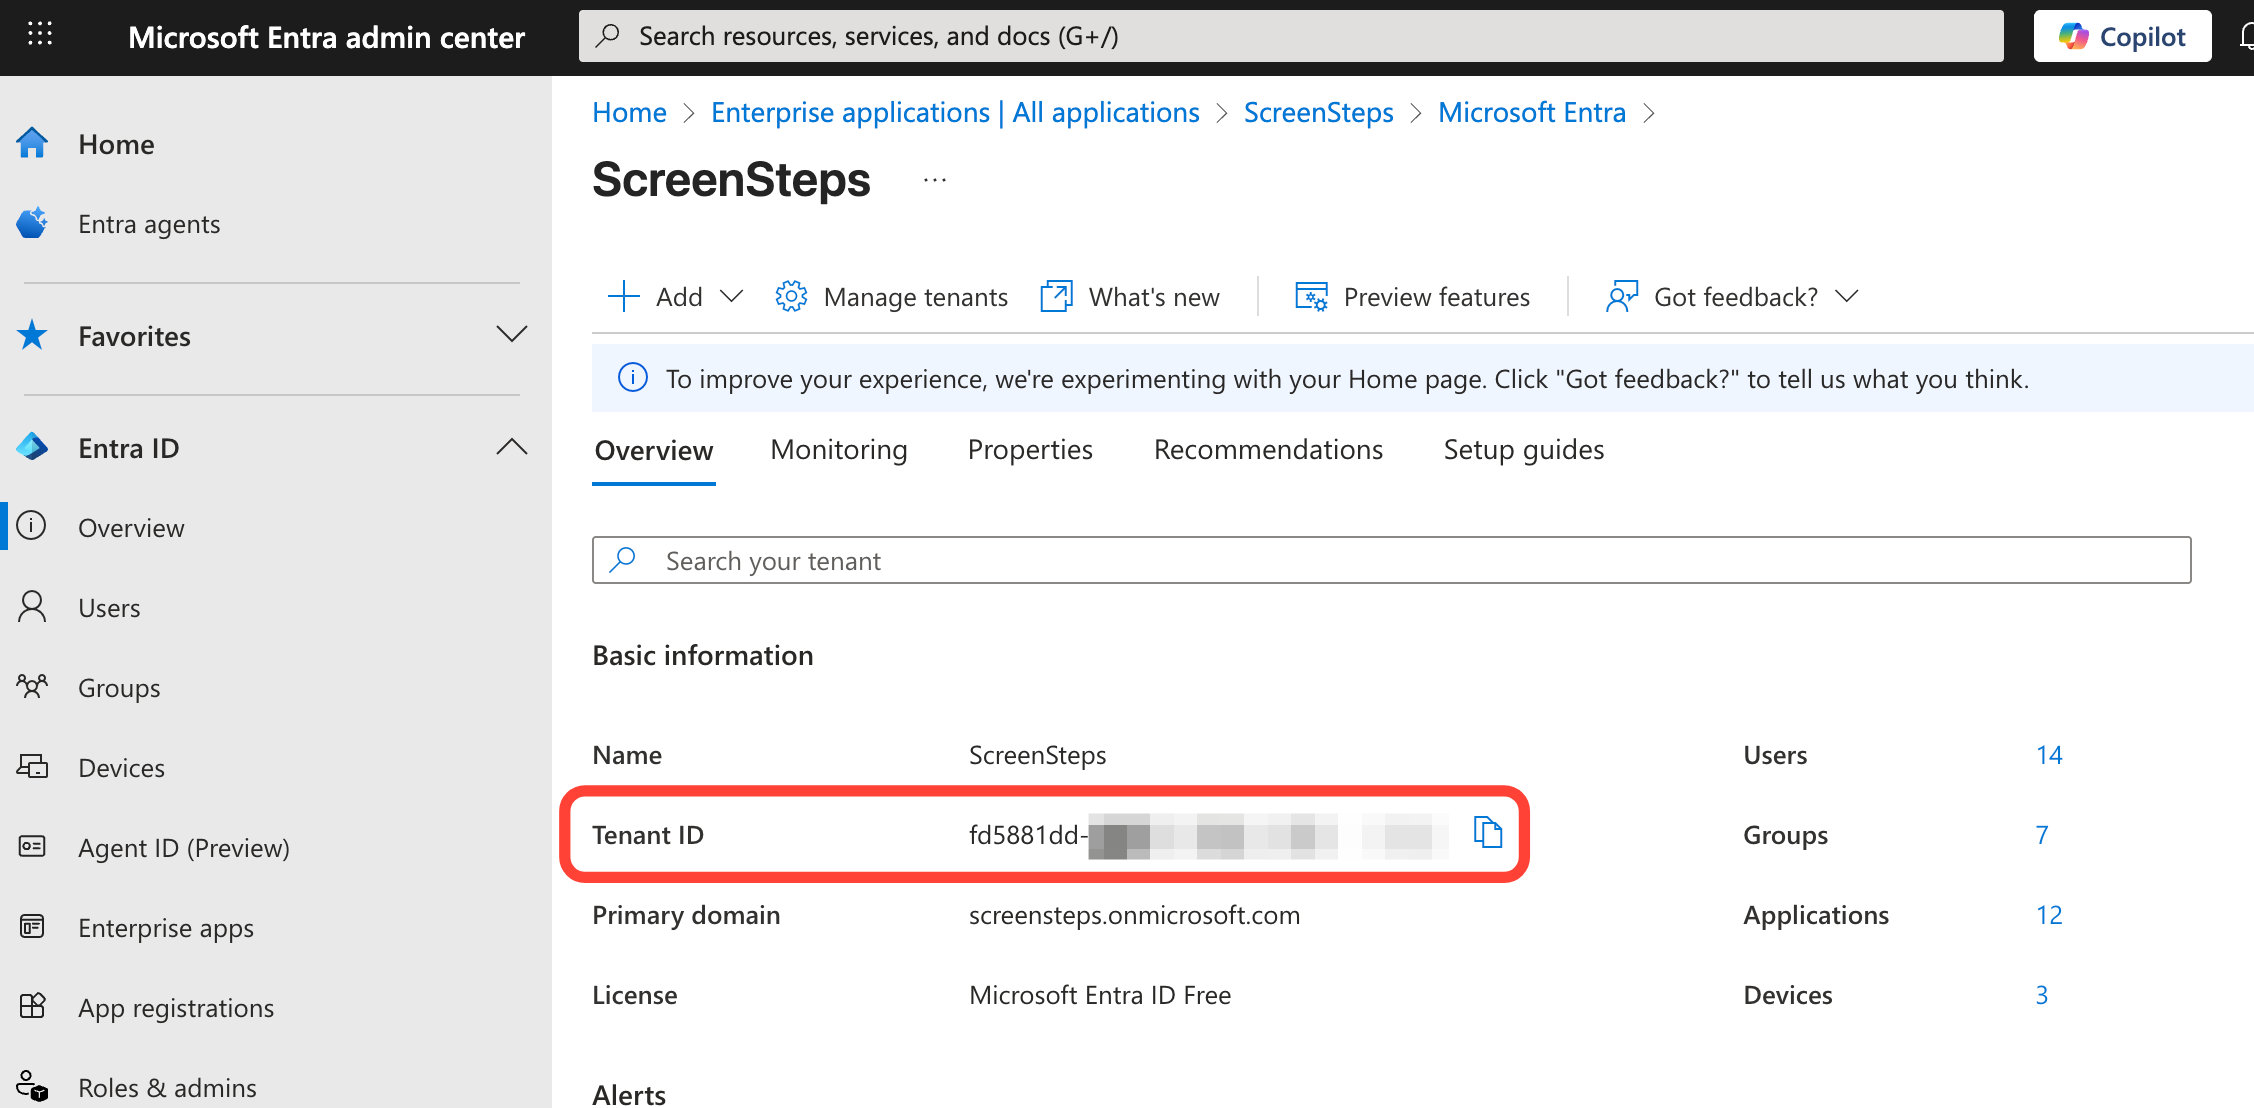
- Open Entra ID > Overview.
- Locate your tenant ID for use in Step 3.
- Navigate to the ScreenSteps Admin Center > Integrations page
- Go to the ScreenSteps Admin Center for your account
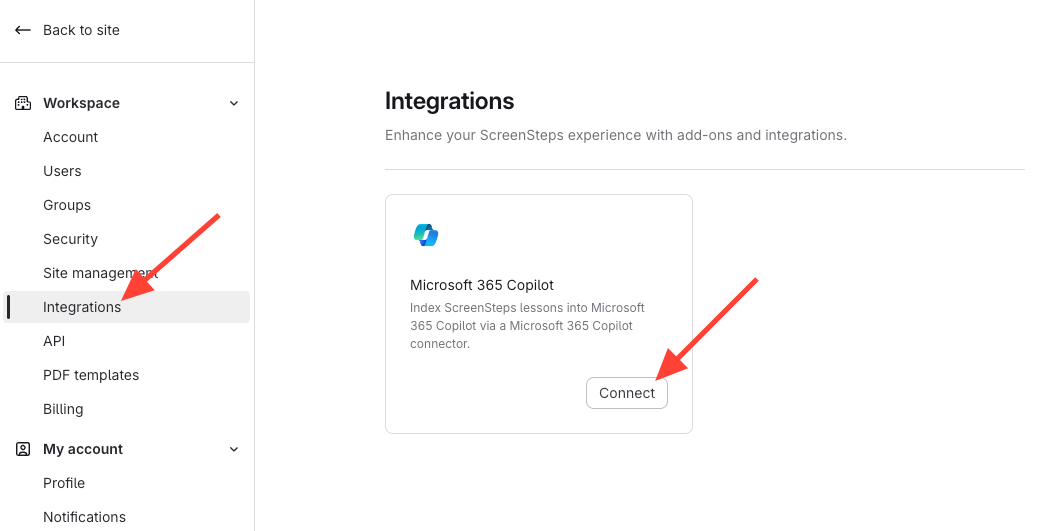
- Navigate to Settings > Workspace > Integrations
- Click on the Connect button for the Microsoft 365 Copilot integration
- Grant consent for the ScreenSteps application to your organization's Microsoft Entra ID Tenant
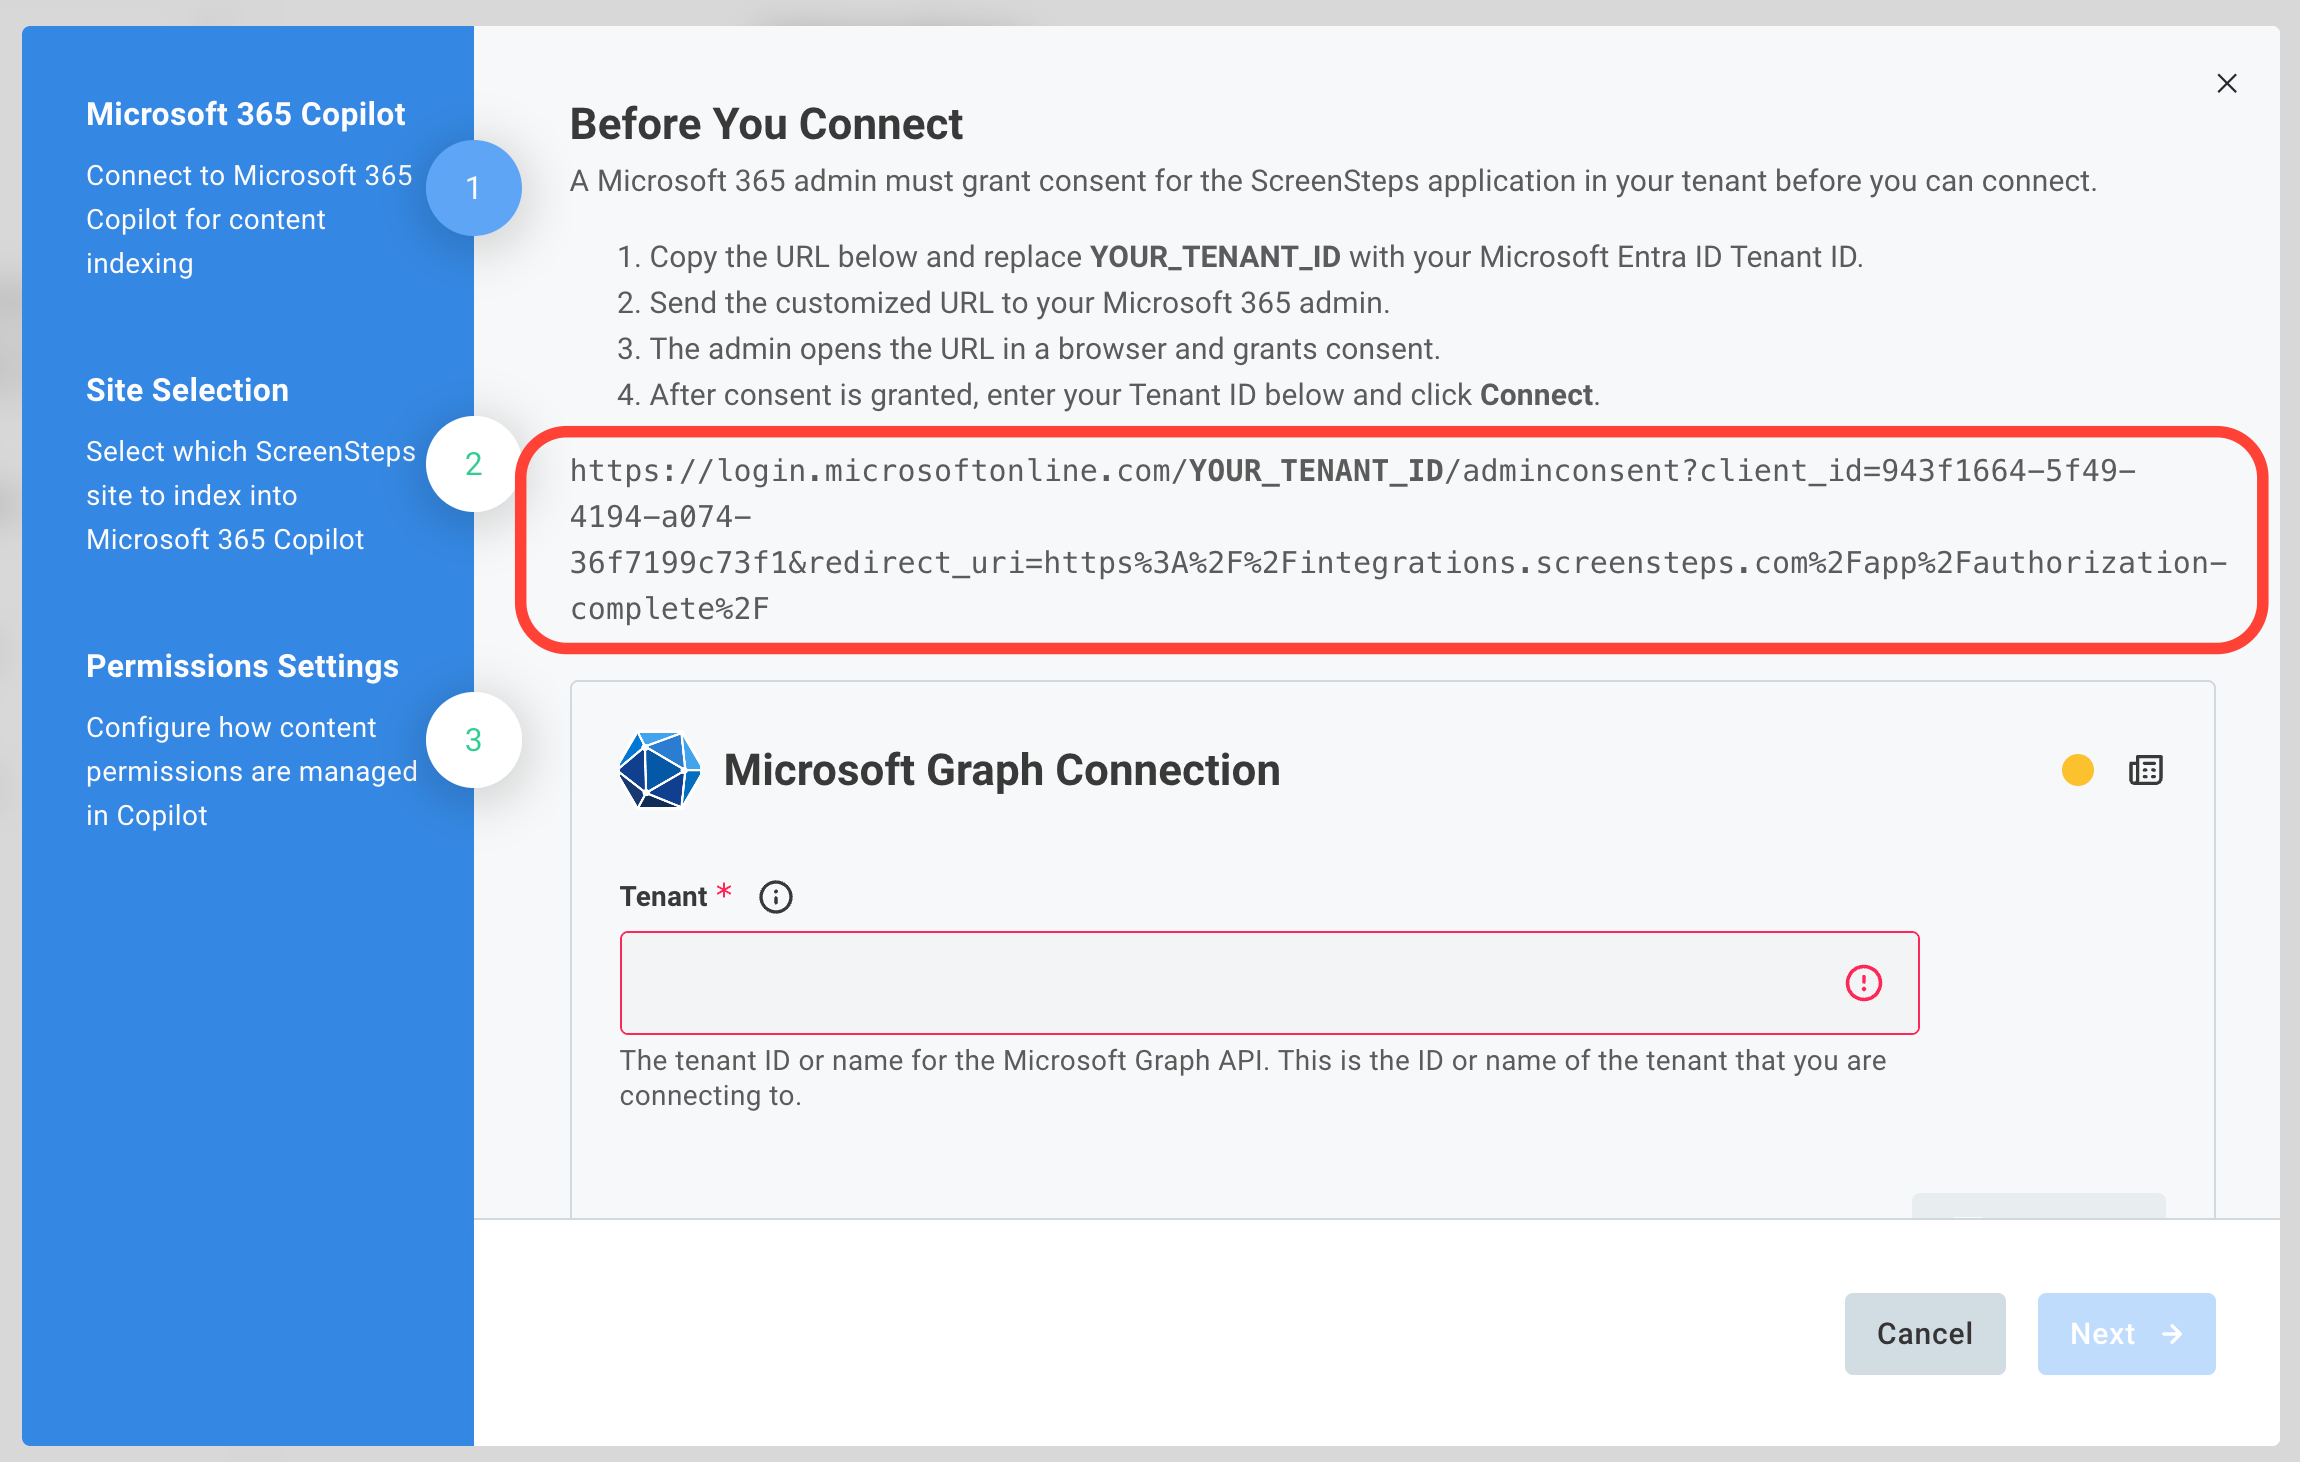
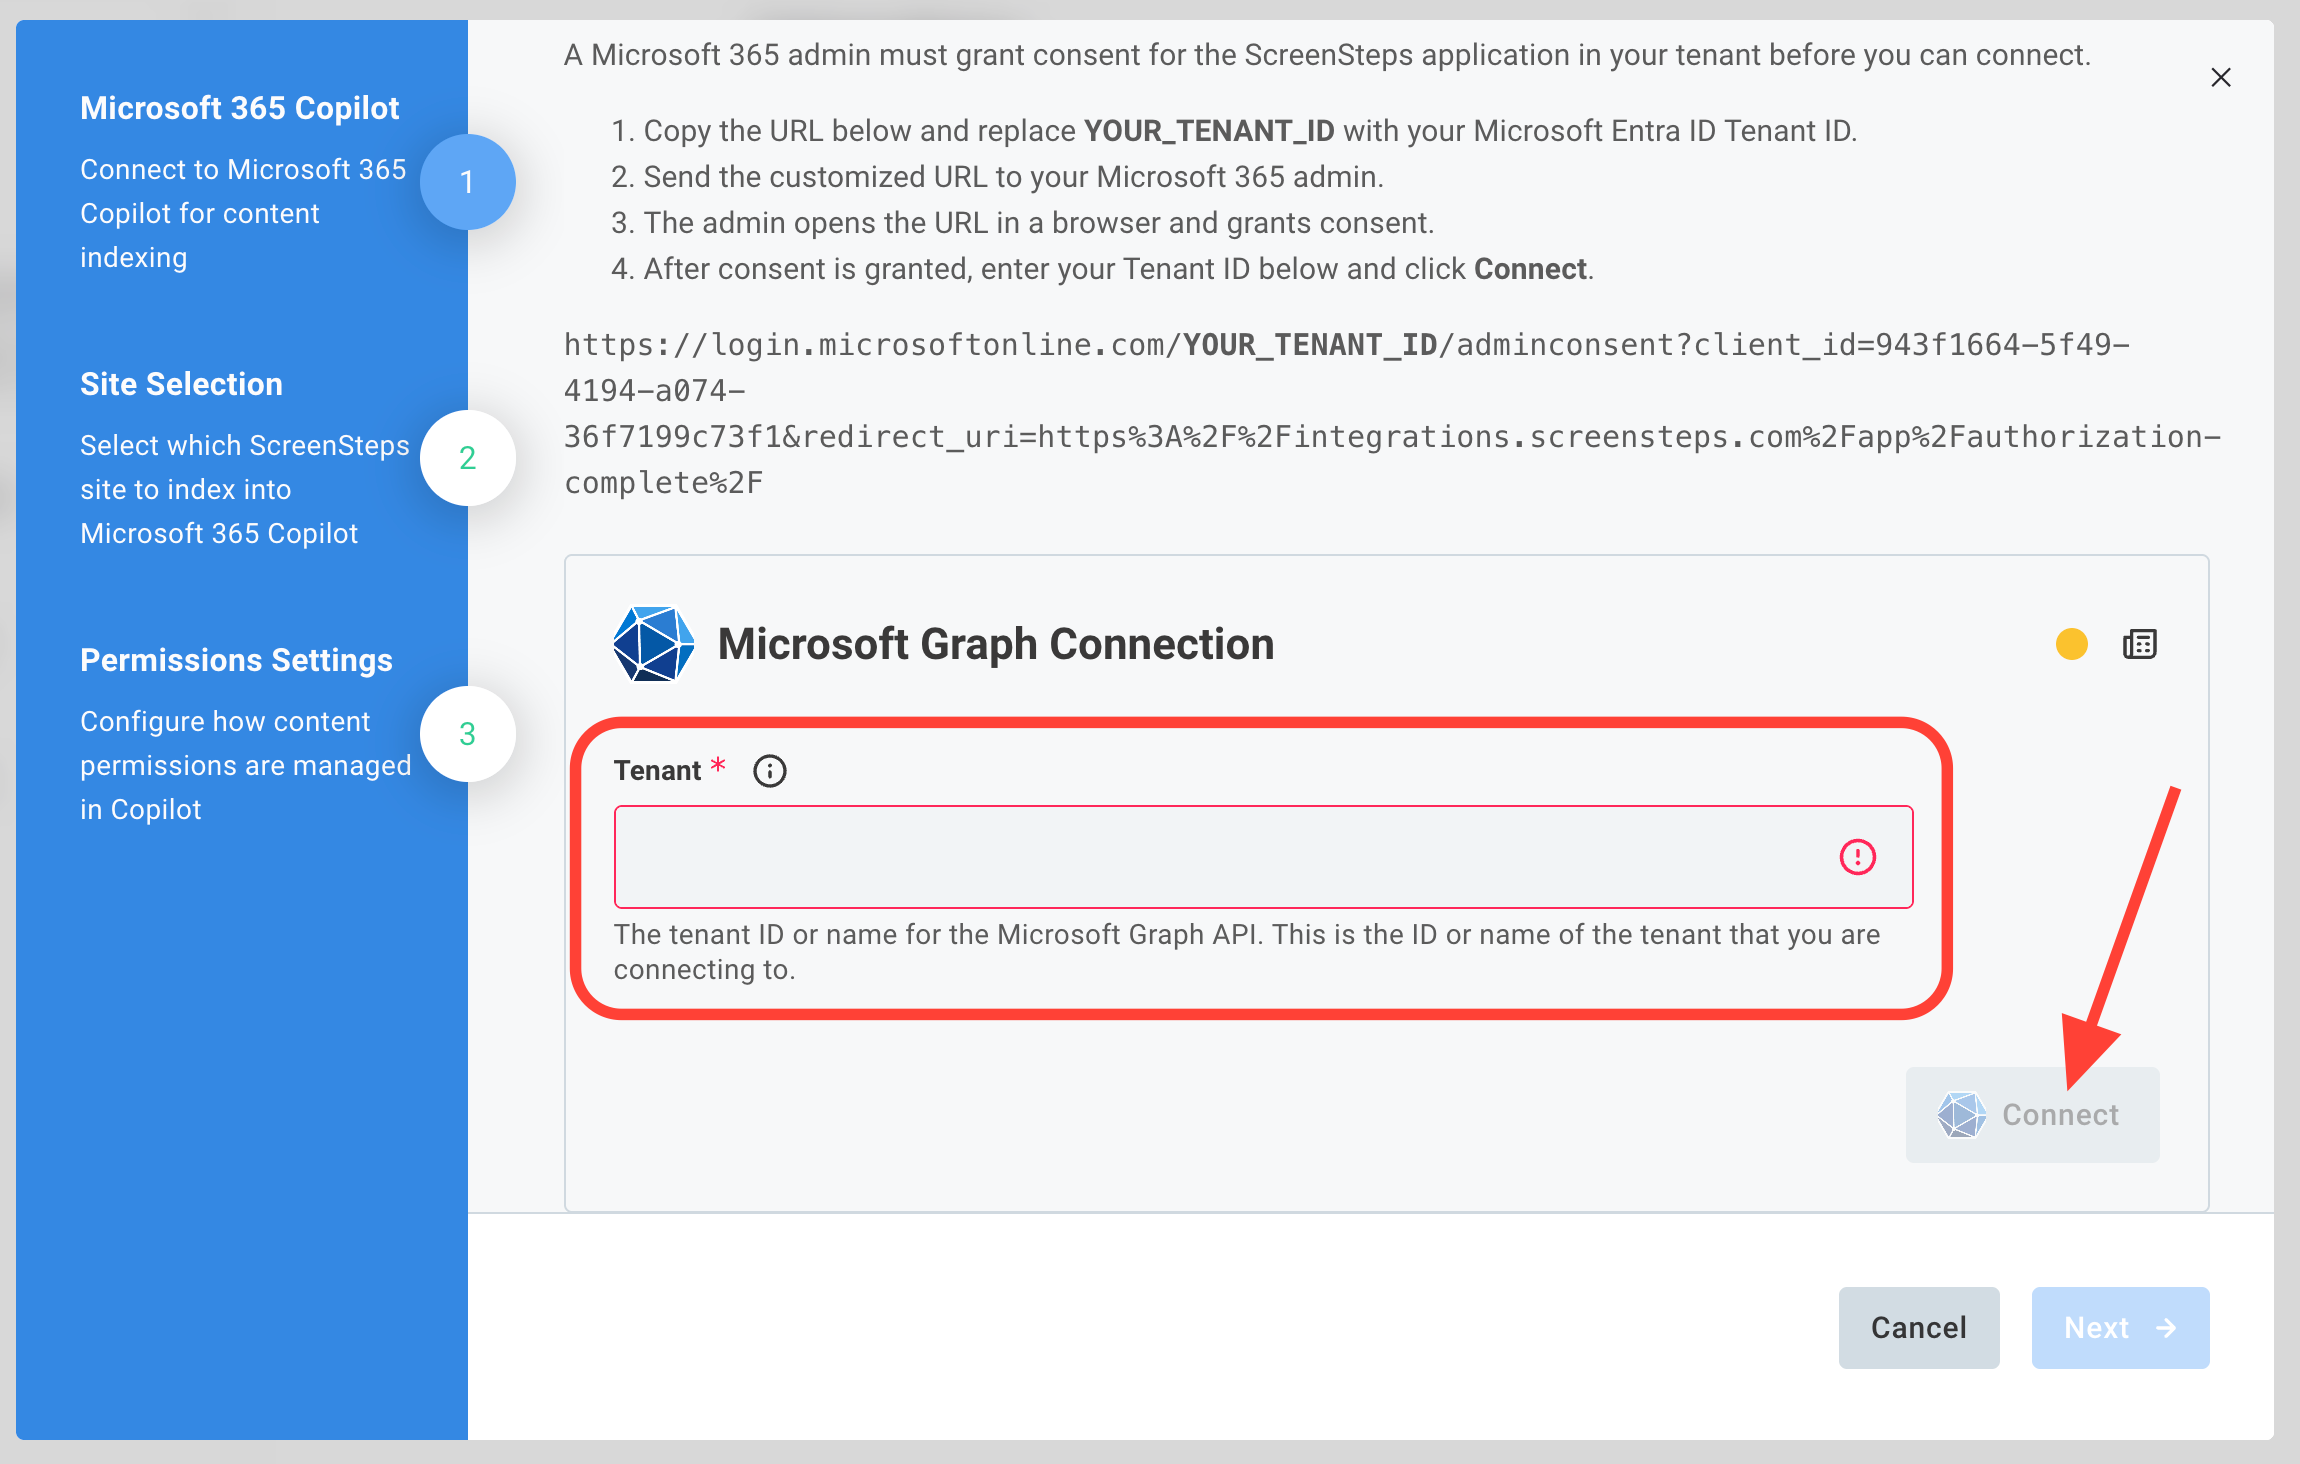
The first step is to grant administrative consent to the ScreenSteps Copilot application in your tenant. Copy the URL containing YOUR_TENANT_ID, replace the placeholder with your tenant id, and paste it into a browser.
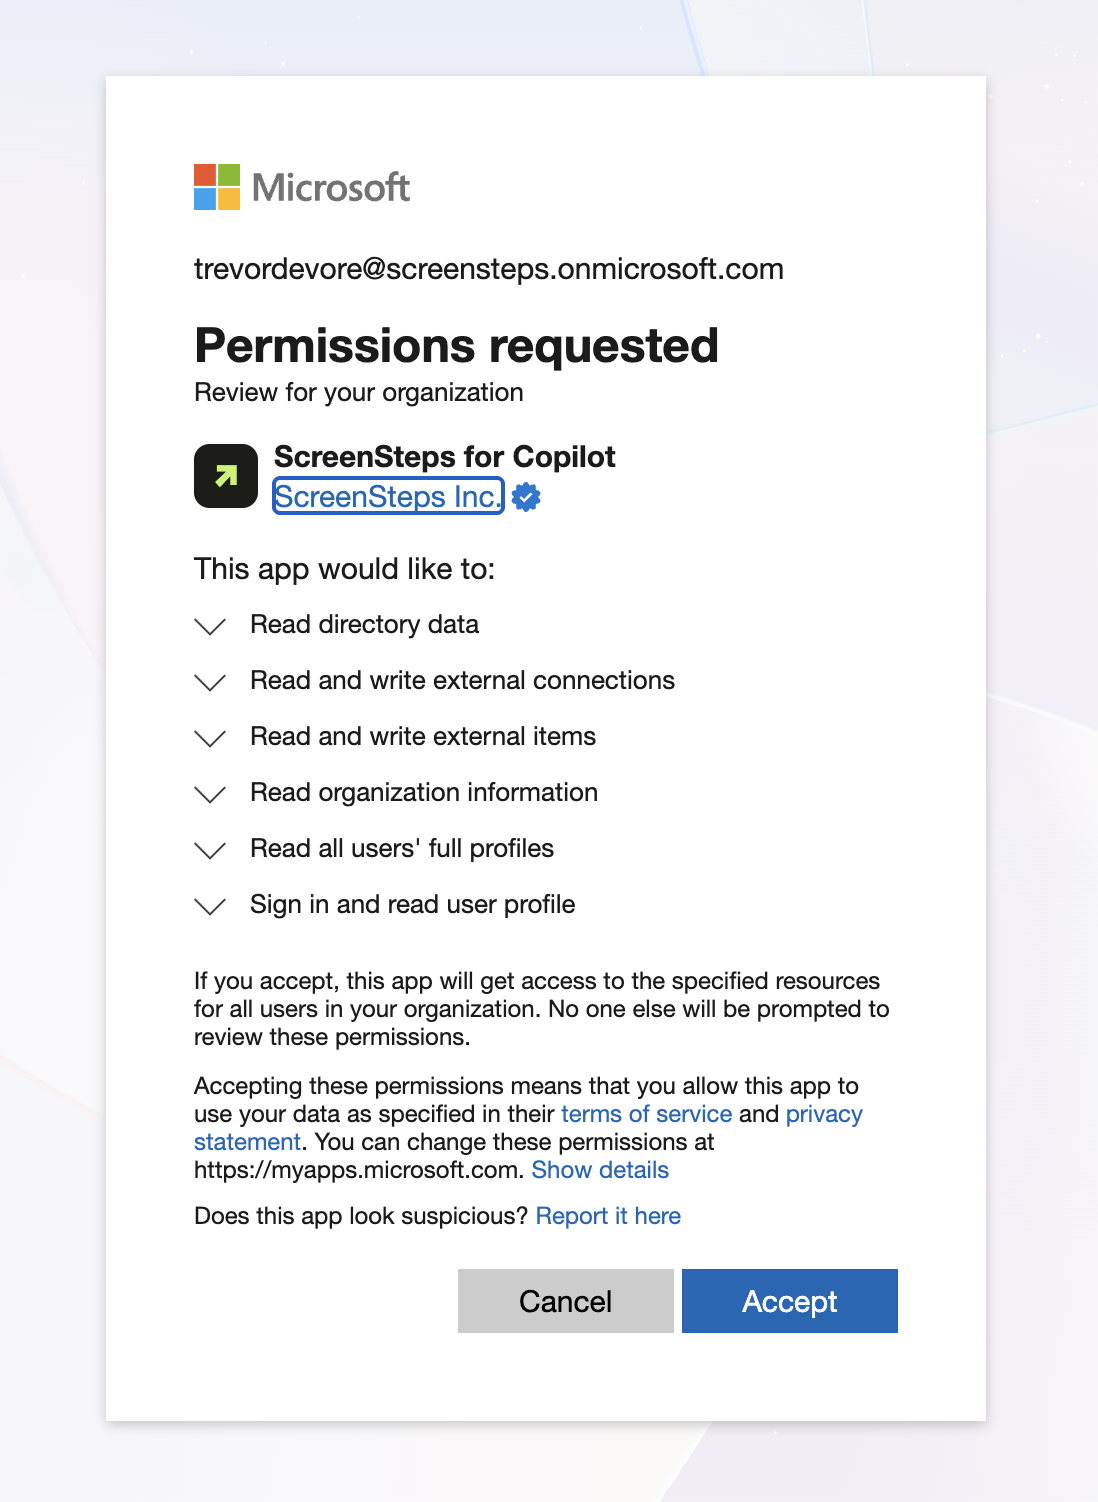
After loading the URL you will be prompted to login to your Microsoft acccount and you will see the Permissions requested form. Click Accept
You will then see the Authorization completed successfully message.
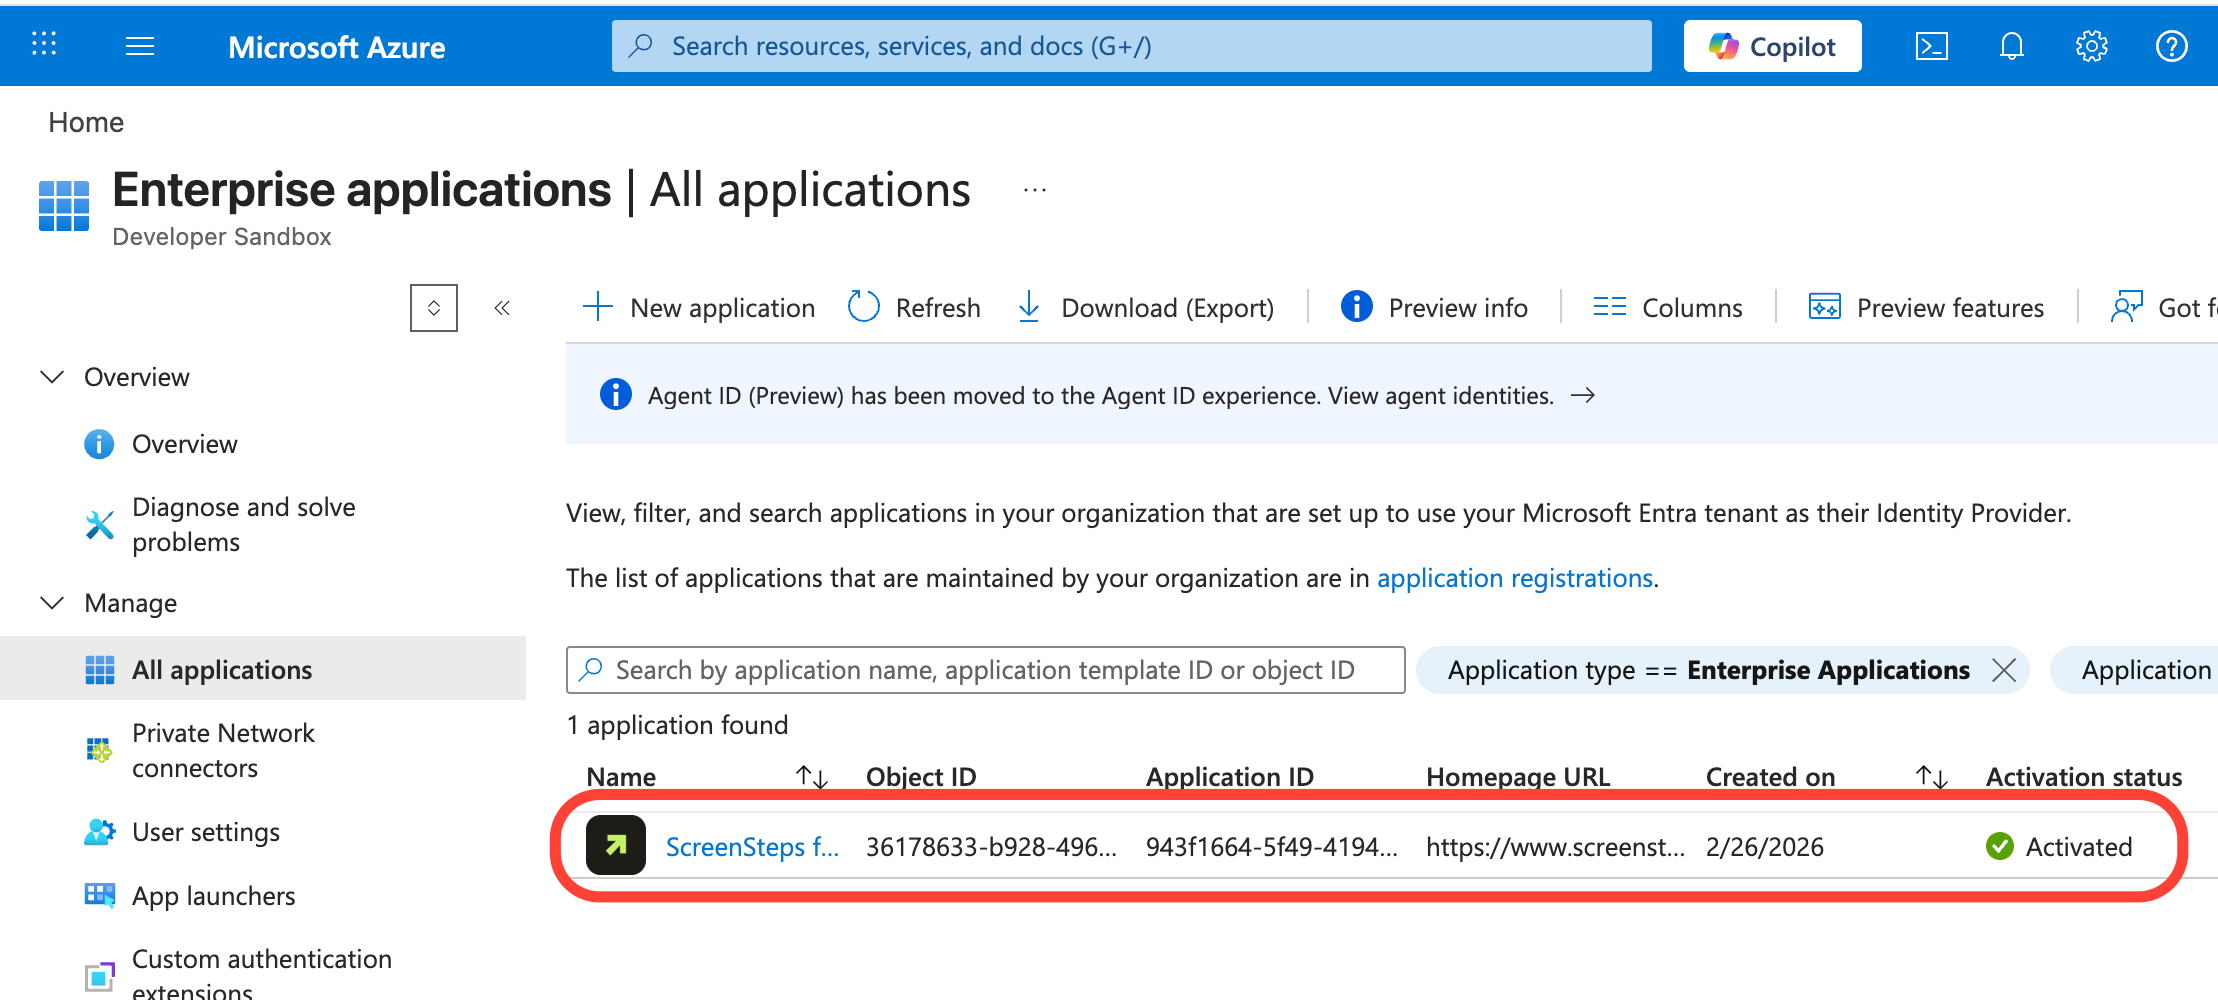
- Confirm that the ScreenSteps application has been granted permissions
You should now see ScreenSteps for Copilot listed under Enterprise applications in your tenant.
If you view the details of the application and look at Permissions you should see that Application permissions have been granted.
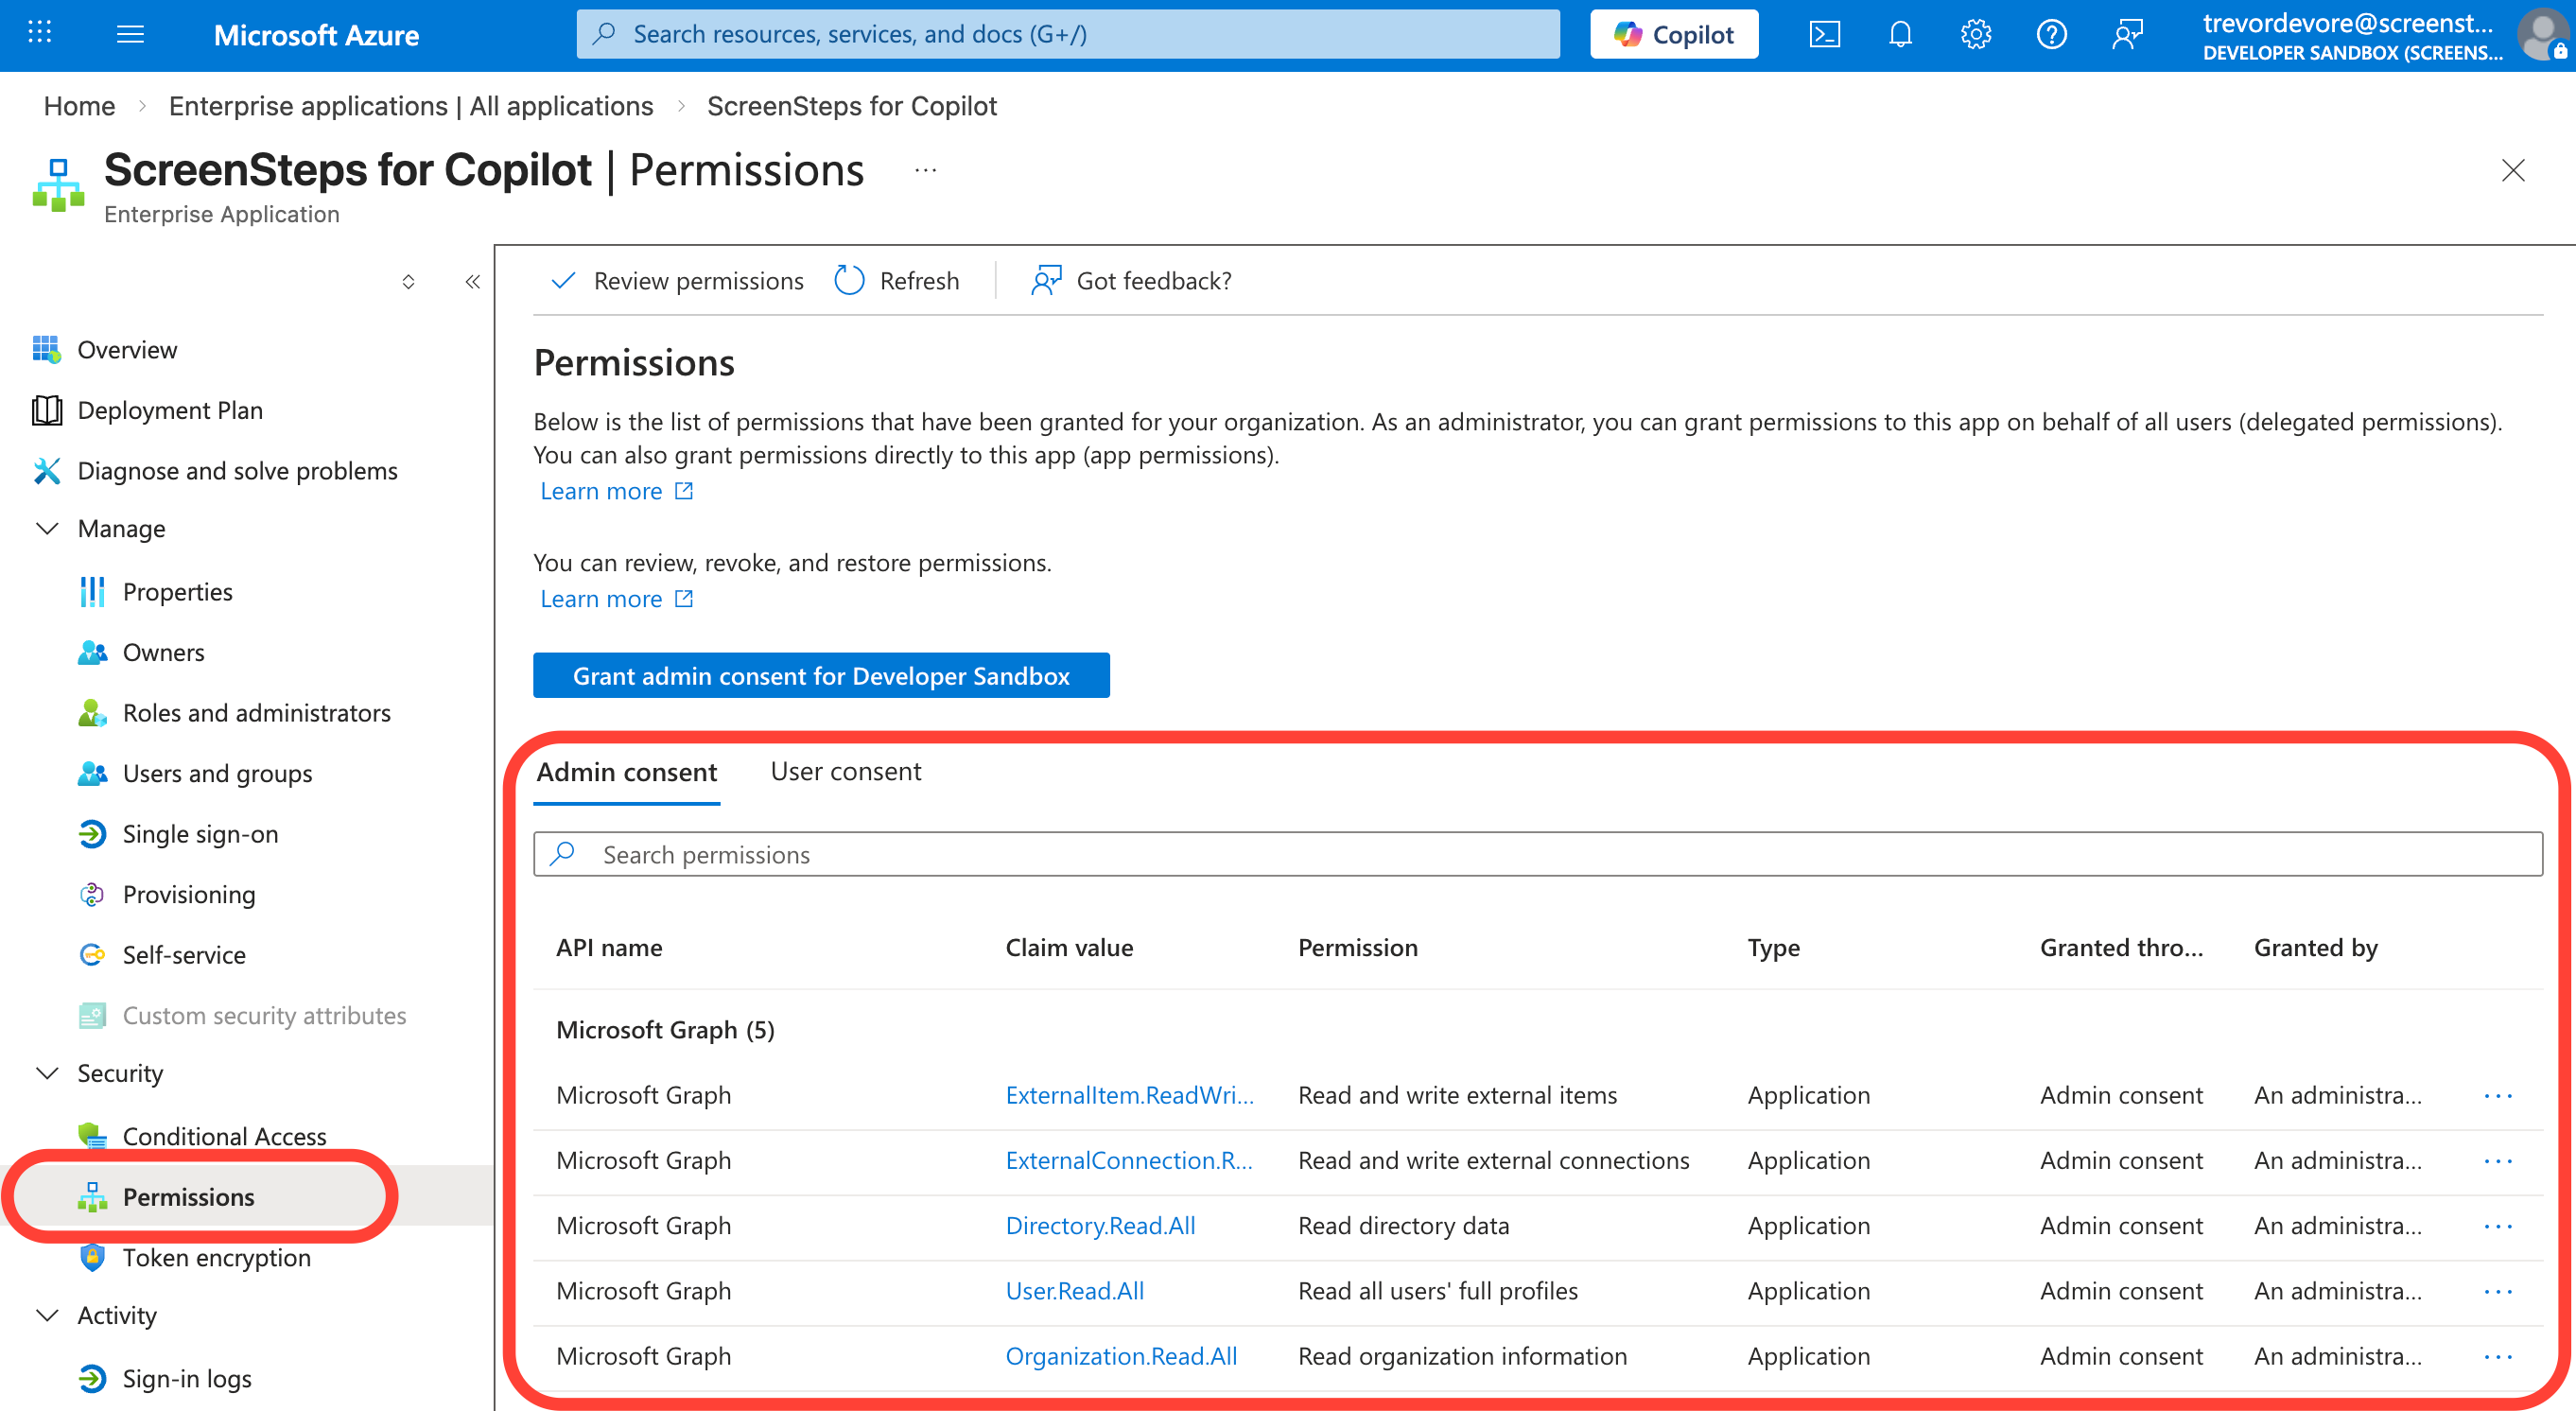
You are now ready to create the Microsoft Graft Connection for the ScreenSteps for Copilot application.
- Connect to Microsoft Graph Connection
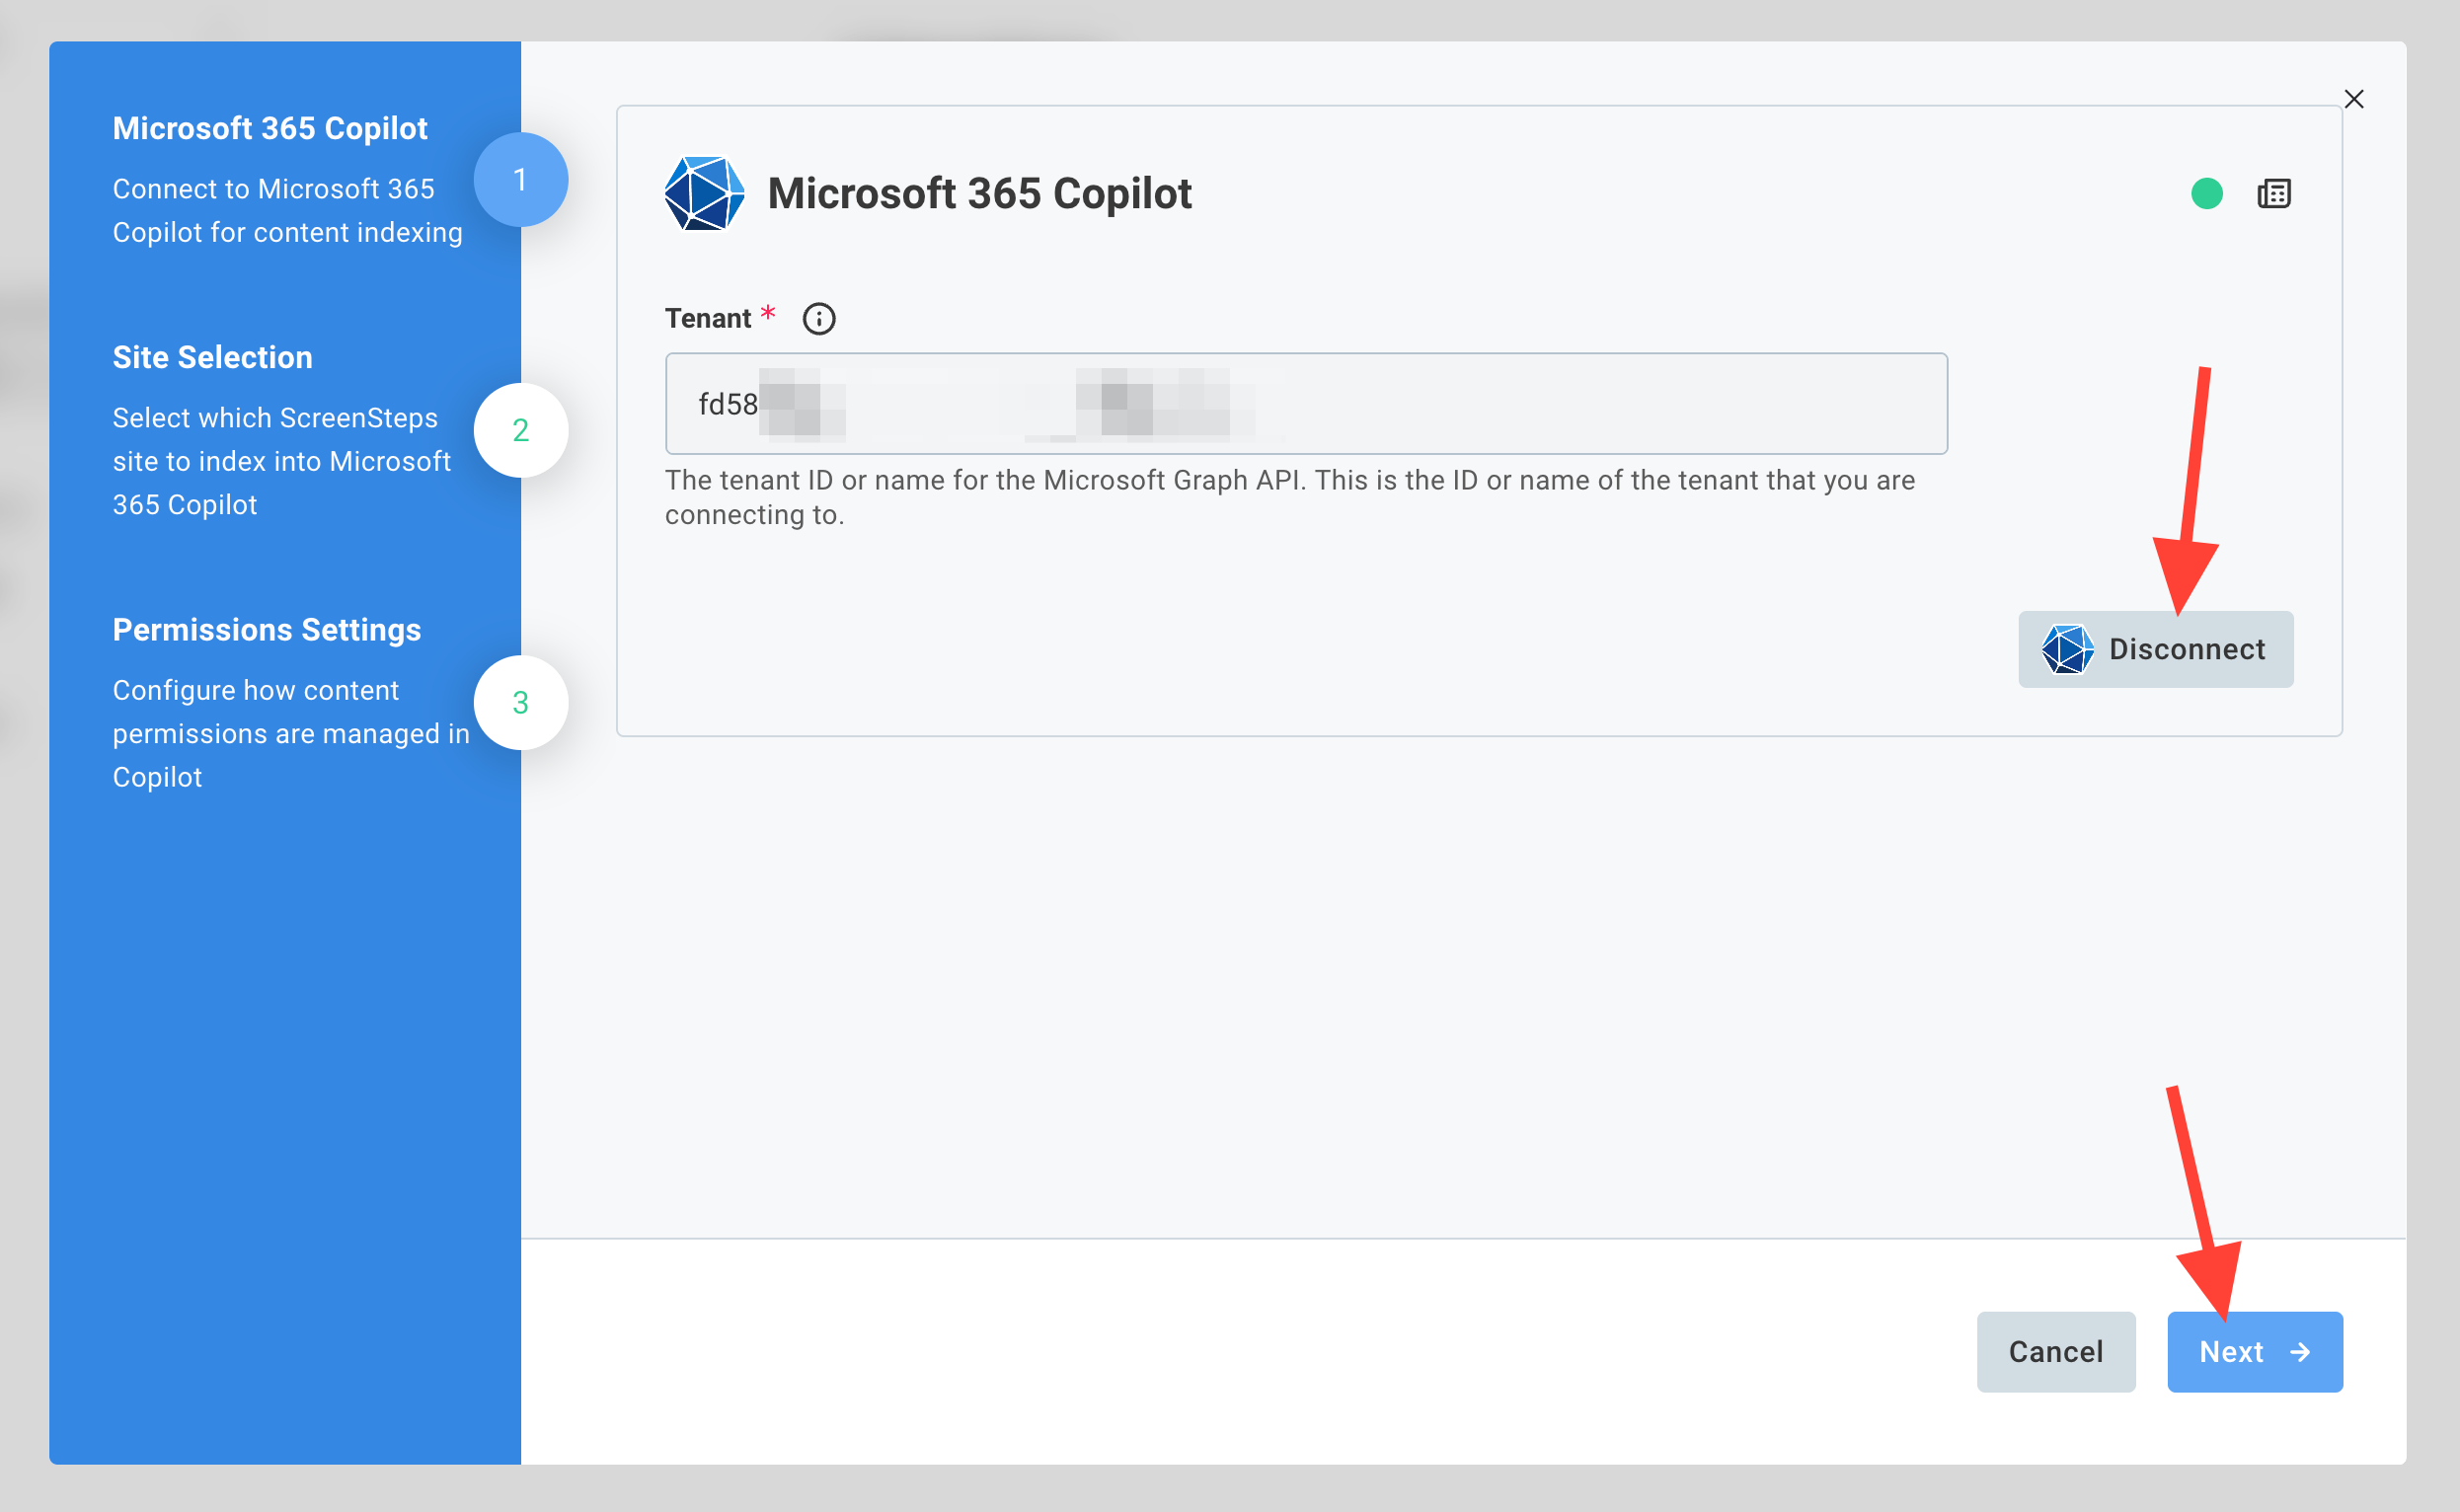
- Enter the Microsoft Entra ID Tenant ID from Step 1 into the Tenant field.
Click Connect.
- A new browser tab will open up to complete the authorization. When you see the "Authorization completed successfully!" message you can close this tab.
- Proceed to Site Selection
When you return to the tab with the integration configuration screen you will see that the Connect button has changed to Disconnect. Click the Next button to proceed to Site Selection.
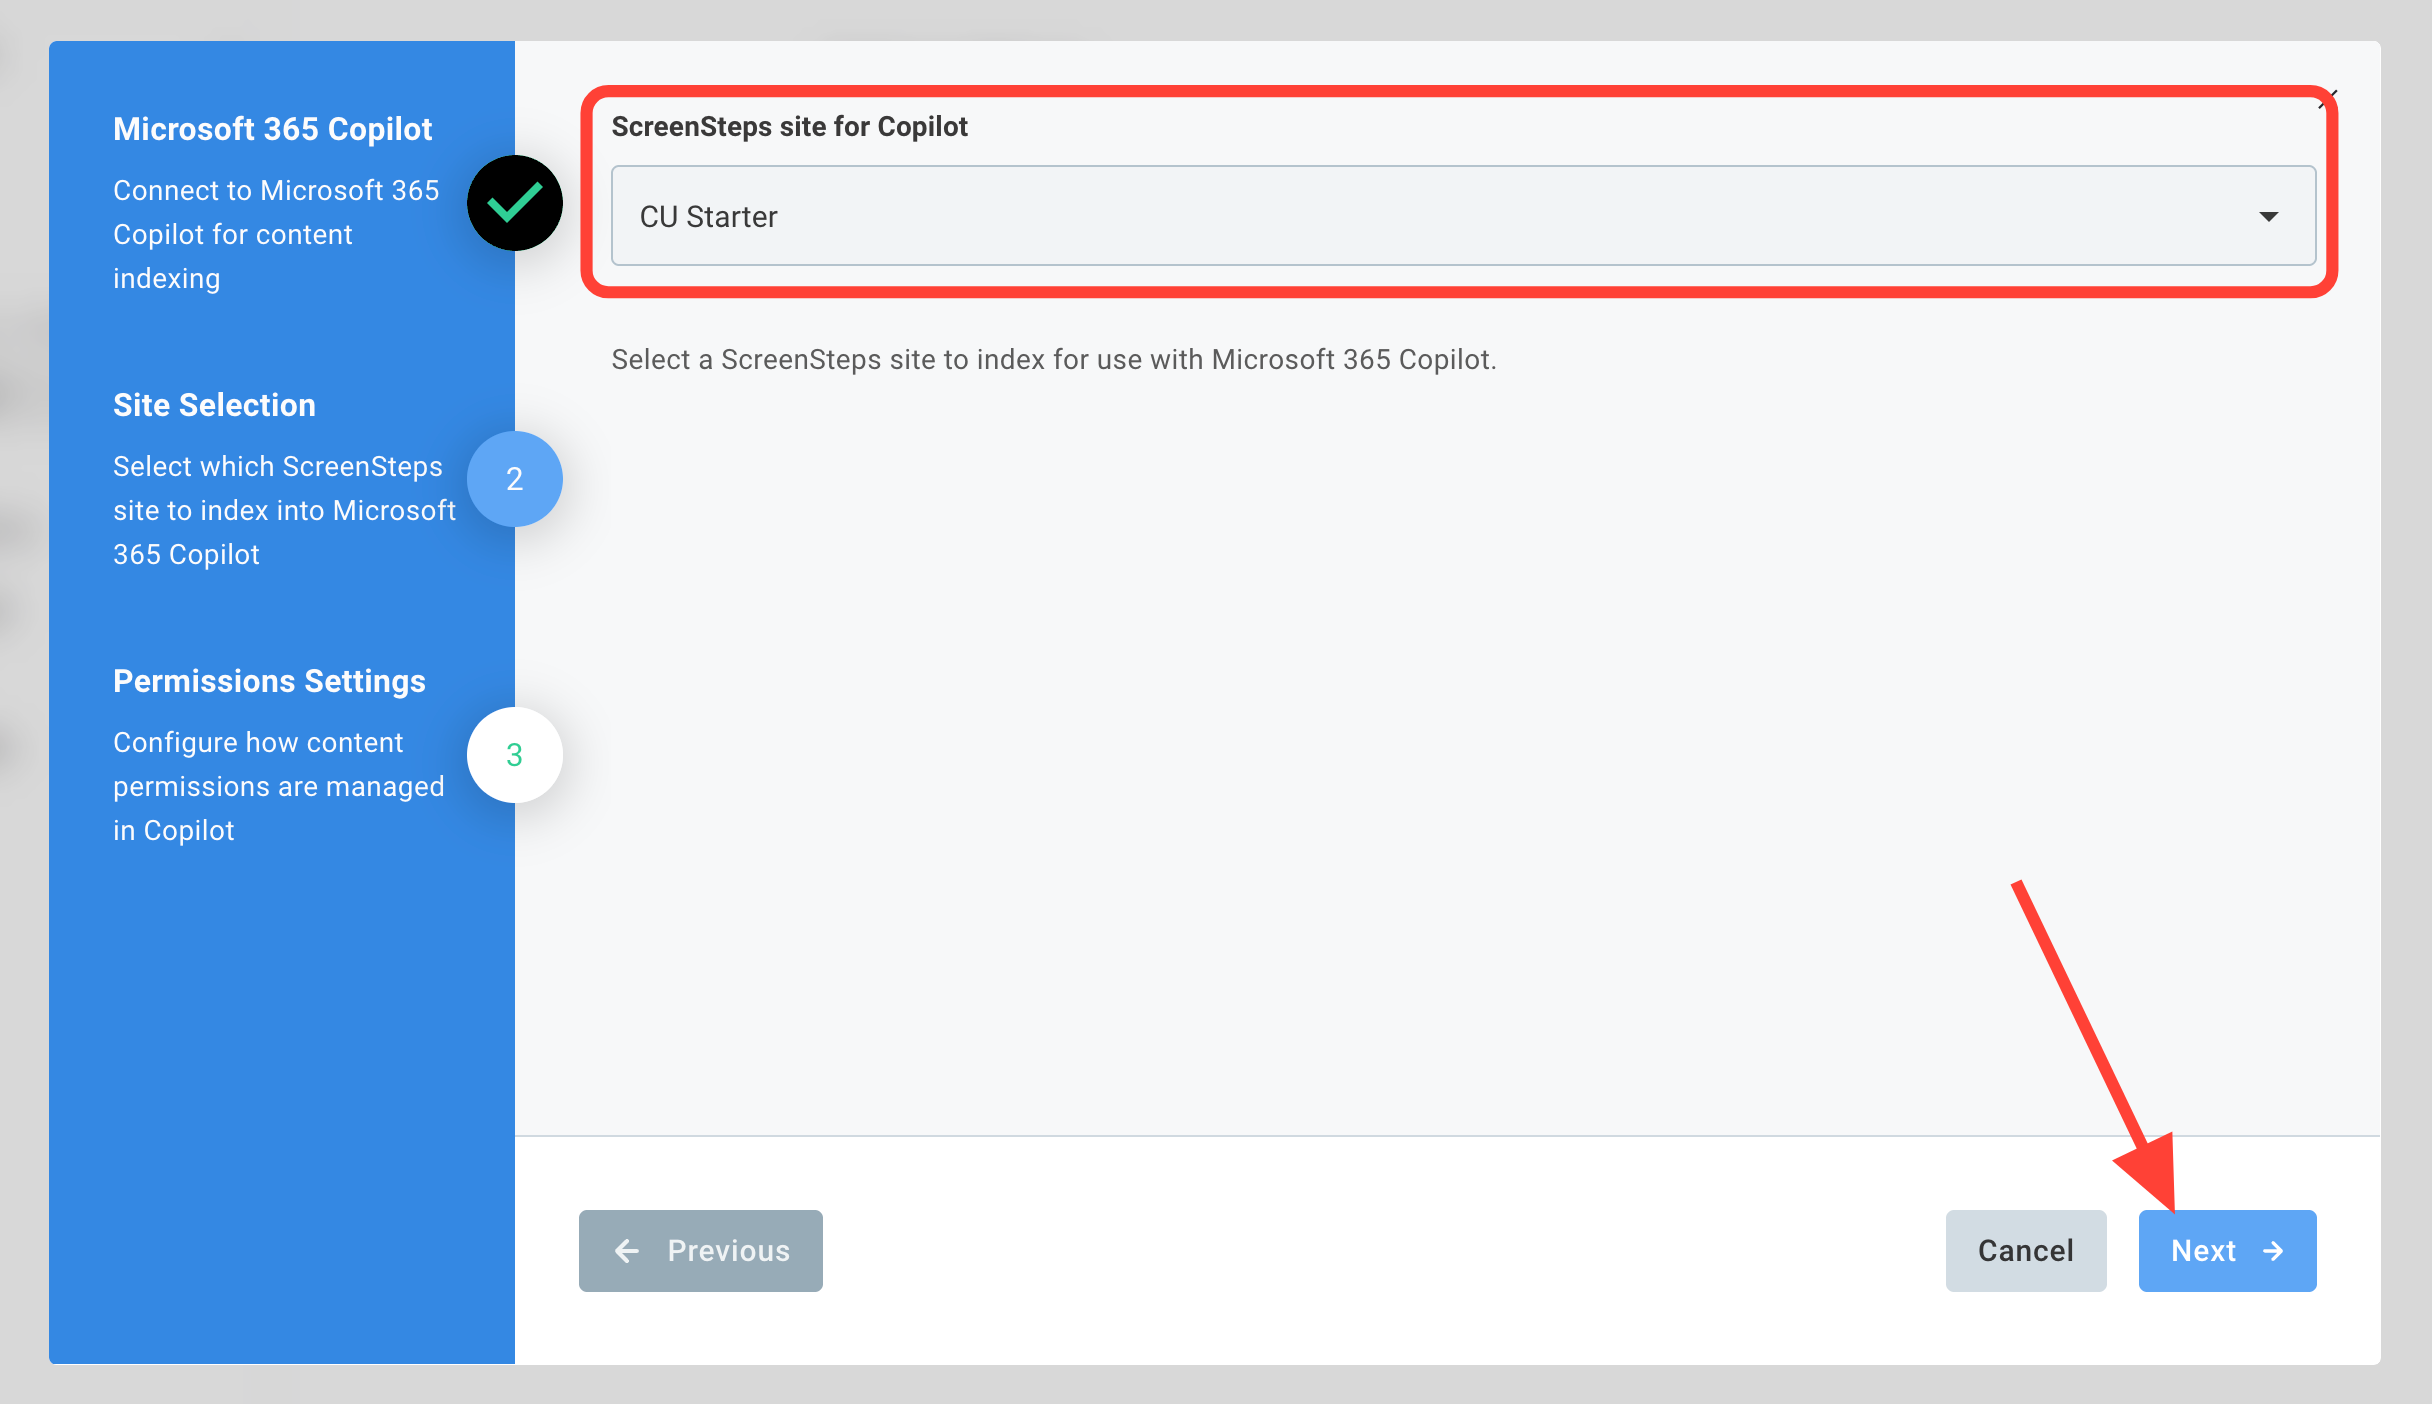
- Select Site to Index
- Select the site to be indexed.
- Click Next
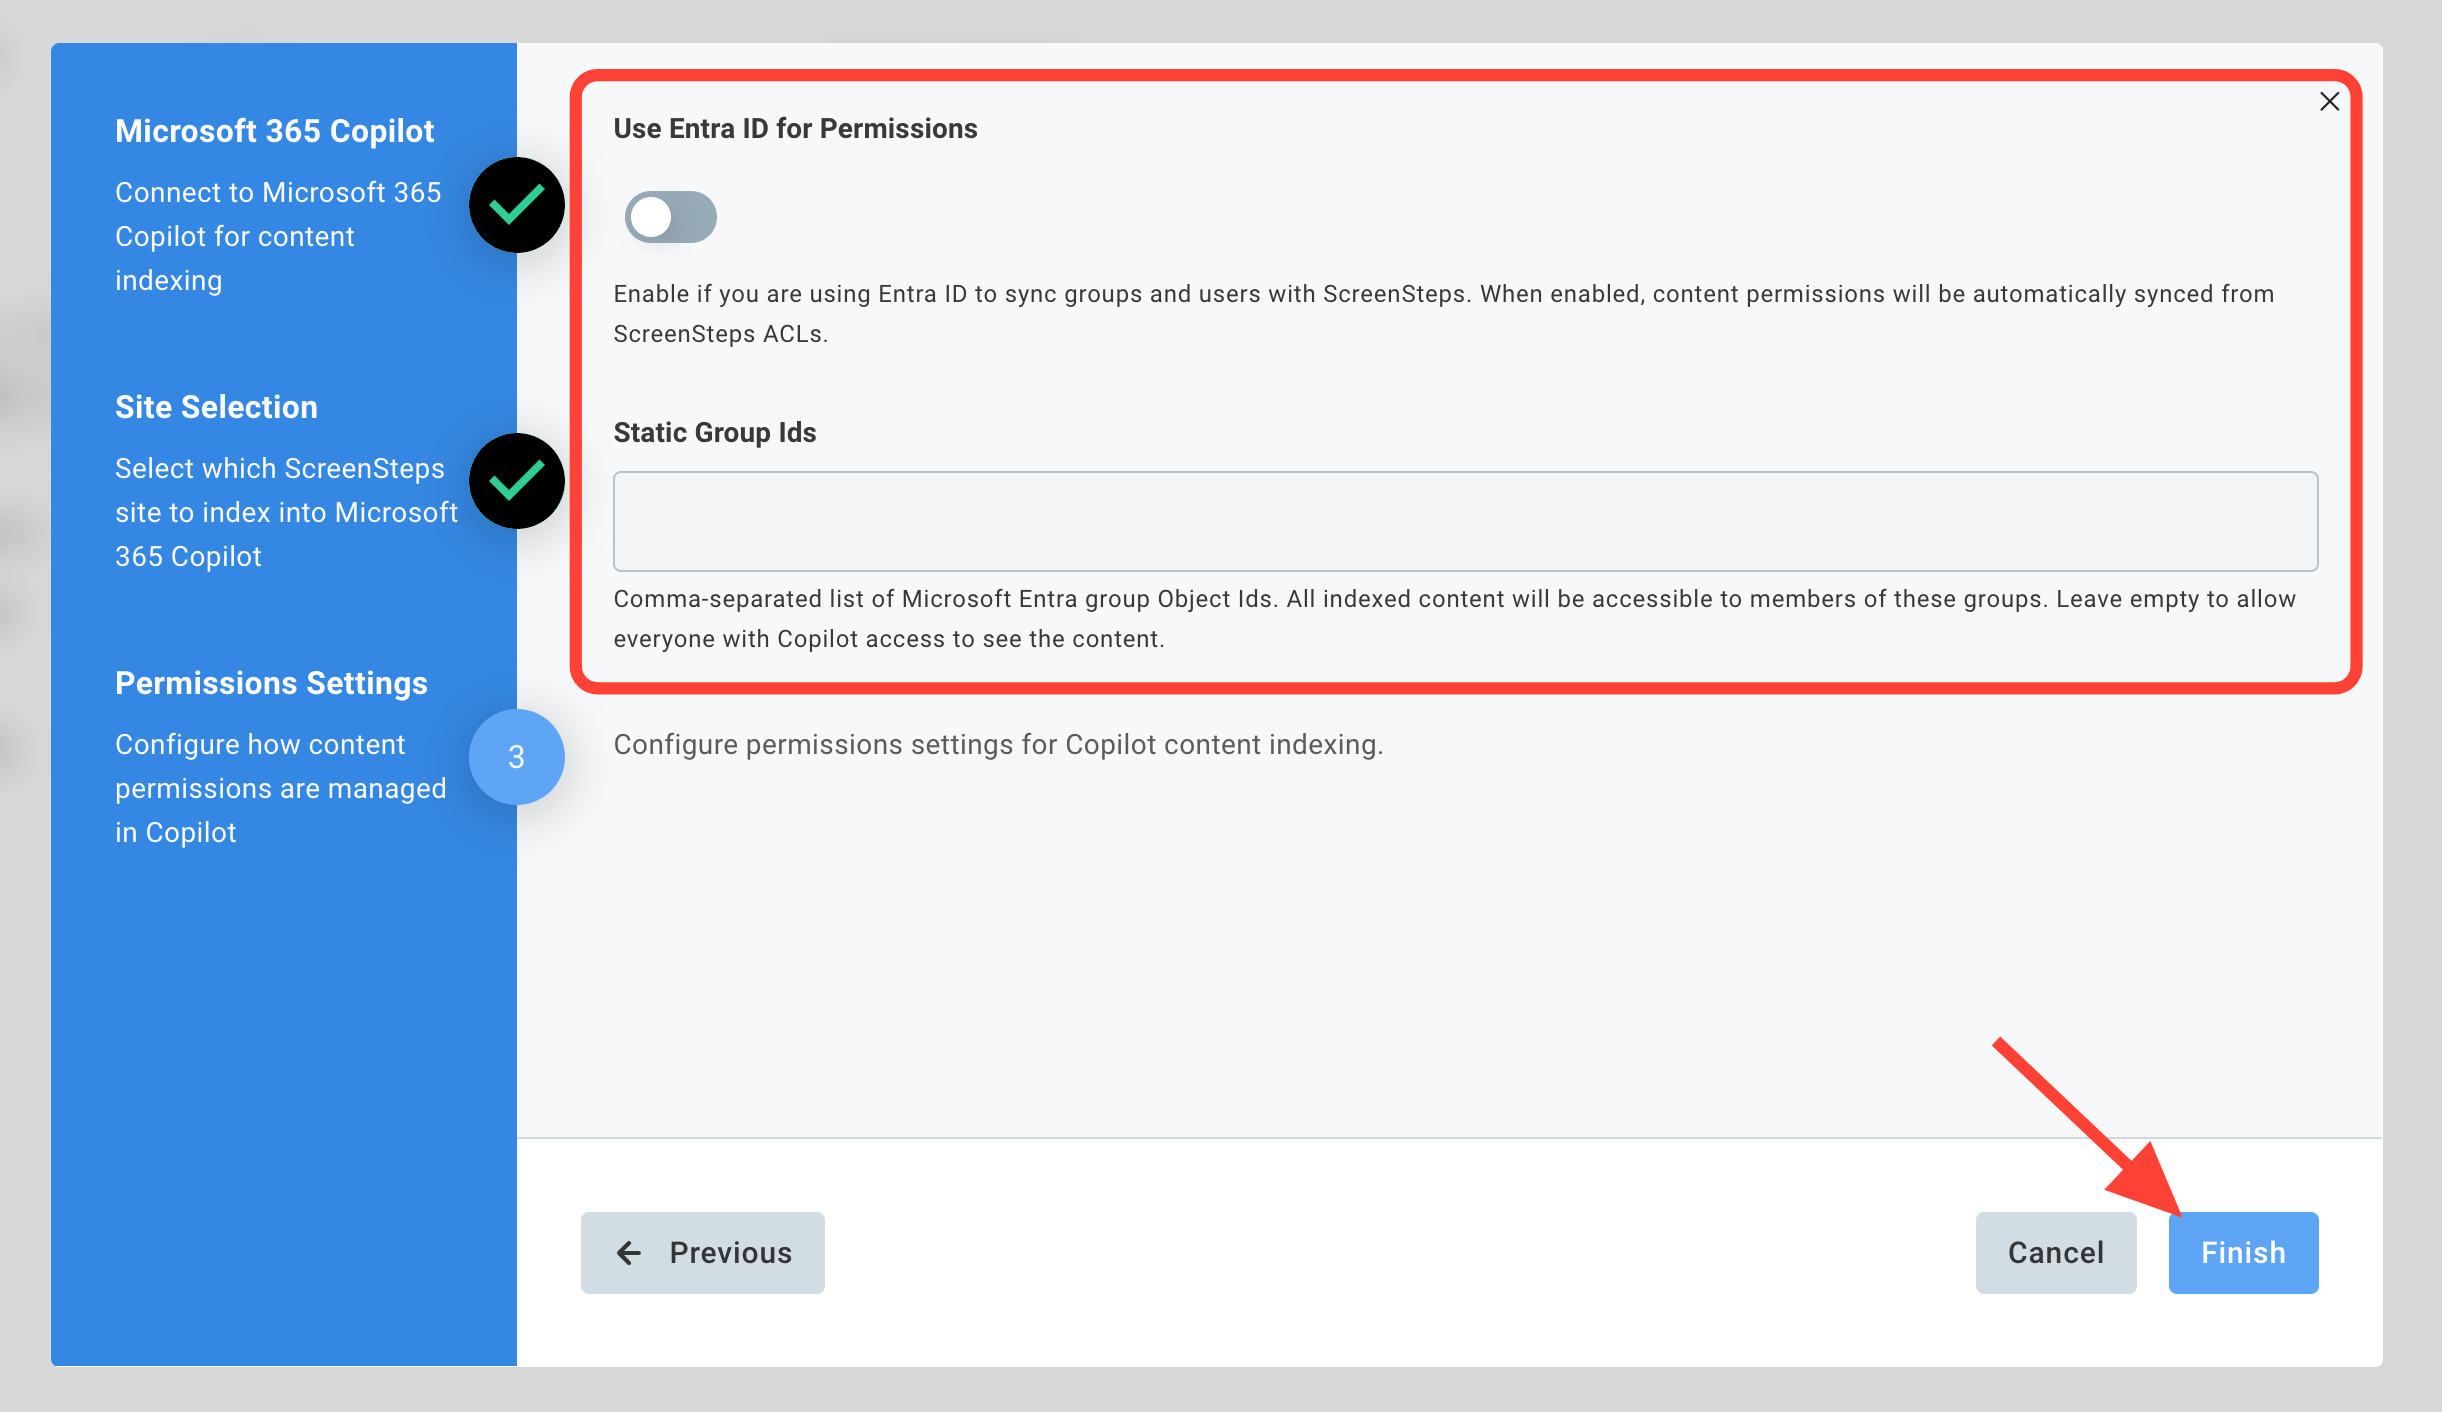
- Configure Permissions and click Finish
Option 1: Use Entra ID for Permissions
If you have connected ScreenSteps to Microsoft Entra ID using SCIM, you can turn on the "Use Entra ID for Permissions" toggle. ScreenSteps will grant access to articles indexed in Copilot to the same users/groups that can access the article in ScreenSteps.
Option 2: Static Group List
Enter a static comma-separated list of Microsoft Entra group Object IDs that will be granted access to all articles indexed in Copilot. If this list is empty, everyone who has access to Copilot will be able to access the articles ScreenSteps indexes.
Click Finish to create a Copilot connector and start syncing articles with Copilot.
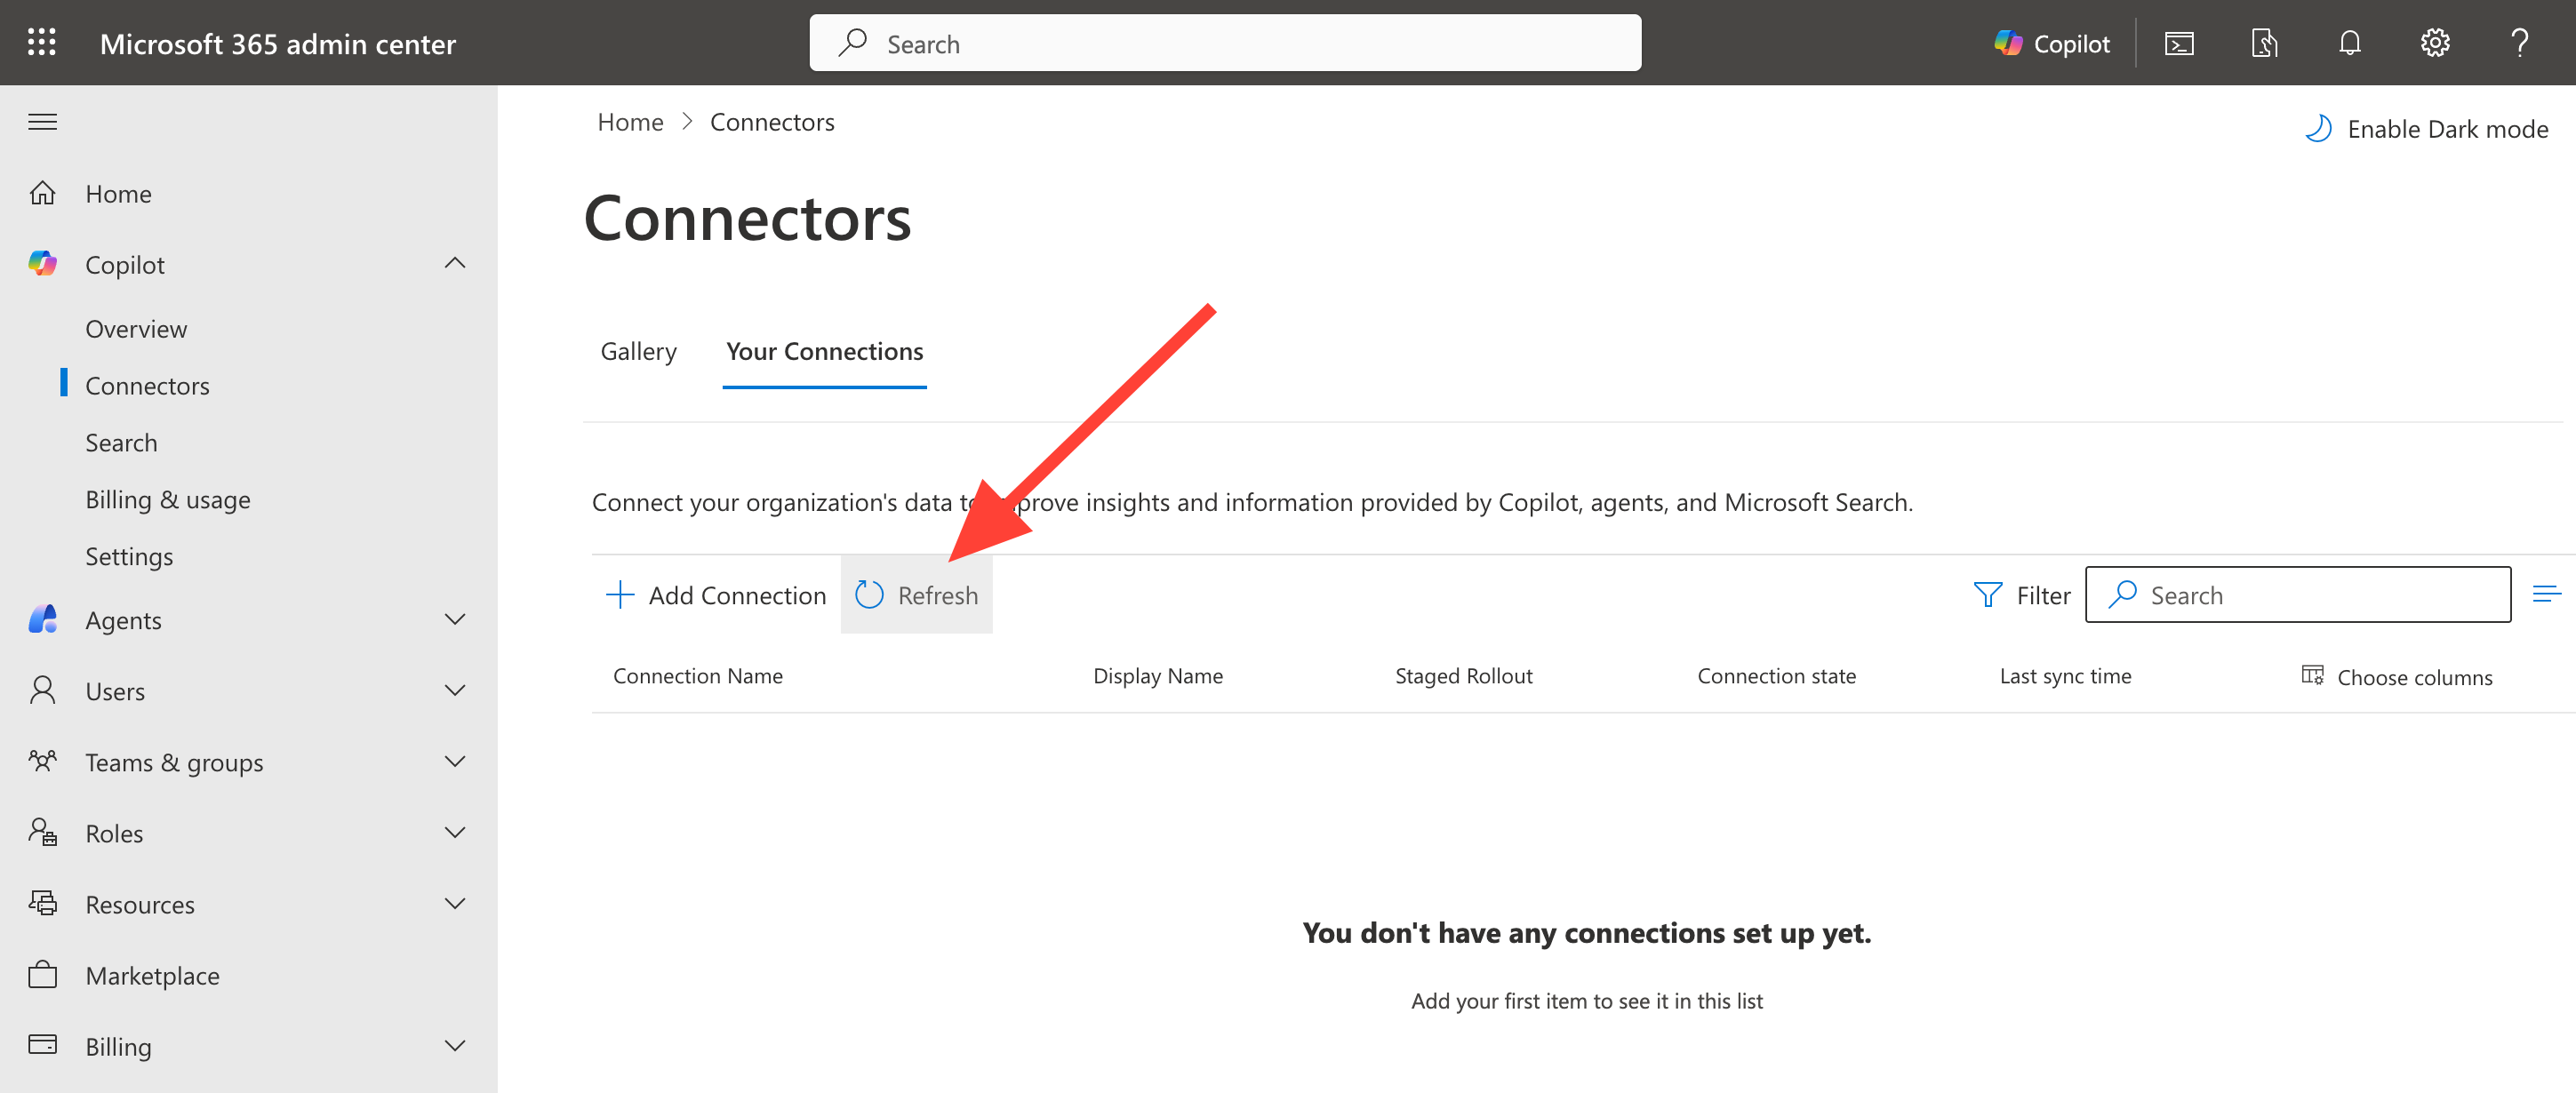
- Navigate to Microsoft 365 admin center > Copilot > Connectors
Before proceeding to the next steps you need to wait for the newly created Copilot connector to enter the Ready state.
- Go to Connectors page in Microsoft 365 Admin Center: https://admin.cloud.microsoft/?#/copilot/connectors
If you don't see the ScreenSteps connector, click Refresh.
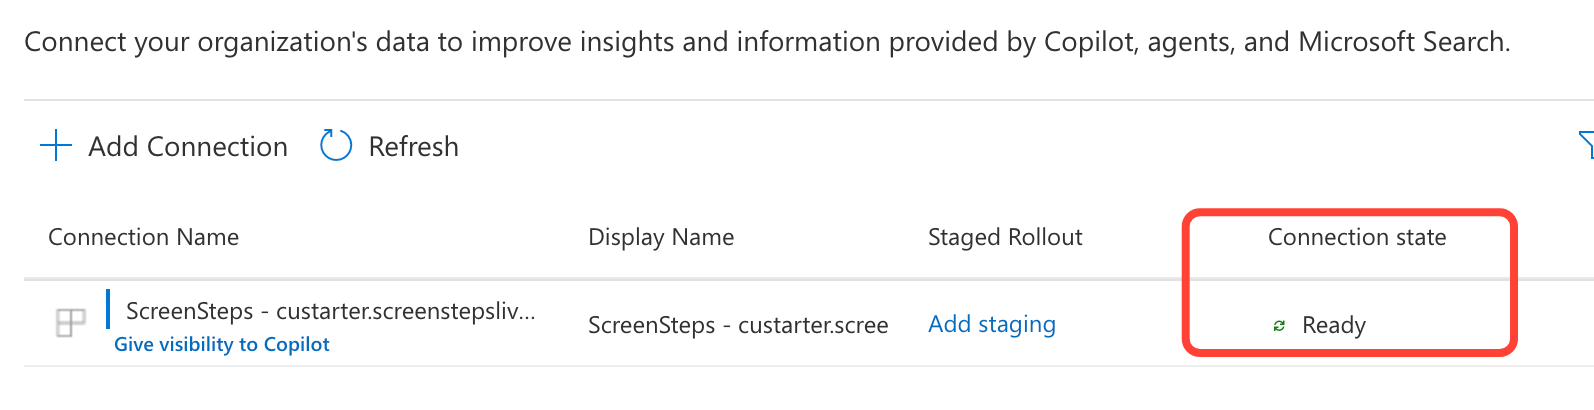
Wait until the connector state changes from Preparing to sync to Ready.
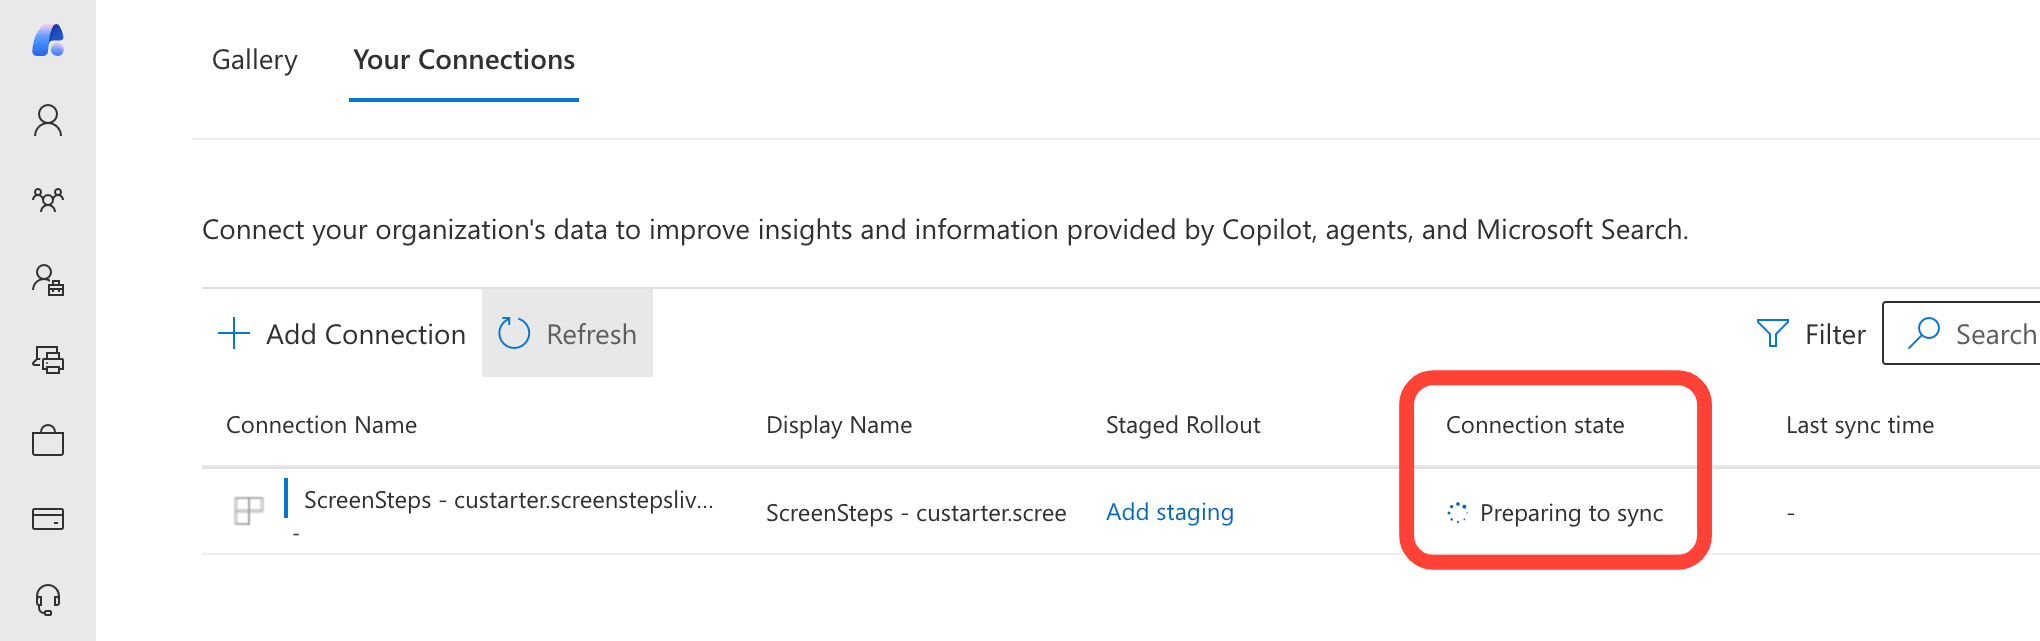
You will need to click Refresh again to see the updated state.
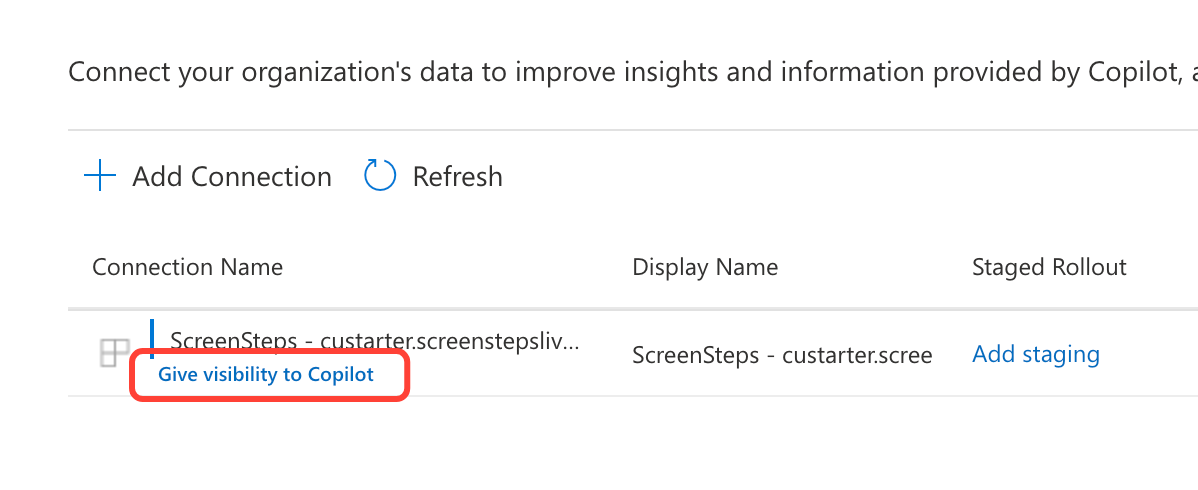
- Give ScreenSteps connector visibility to Copilot
Before the articles that have been indexed in the ScreenSteps connector will be visible to Copilot you must click the Give visibility to Copilot link.
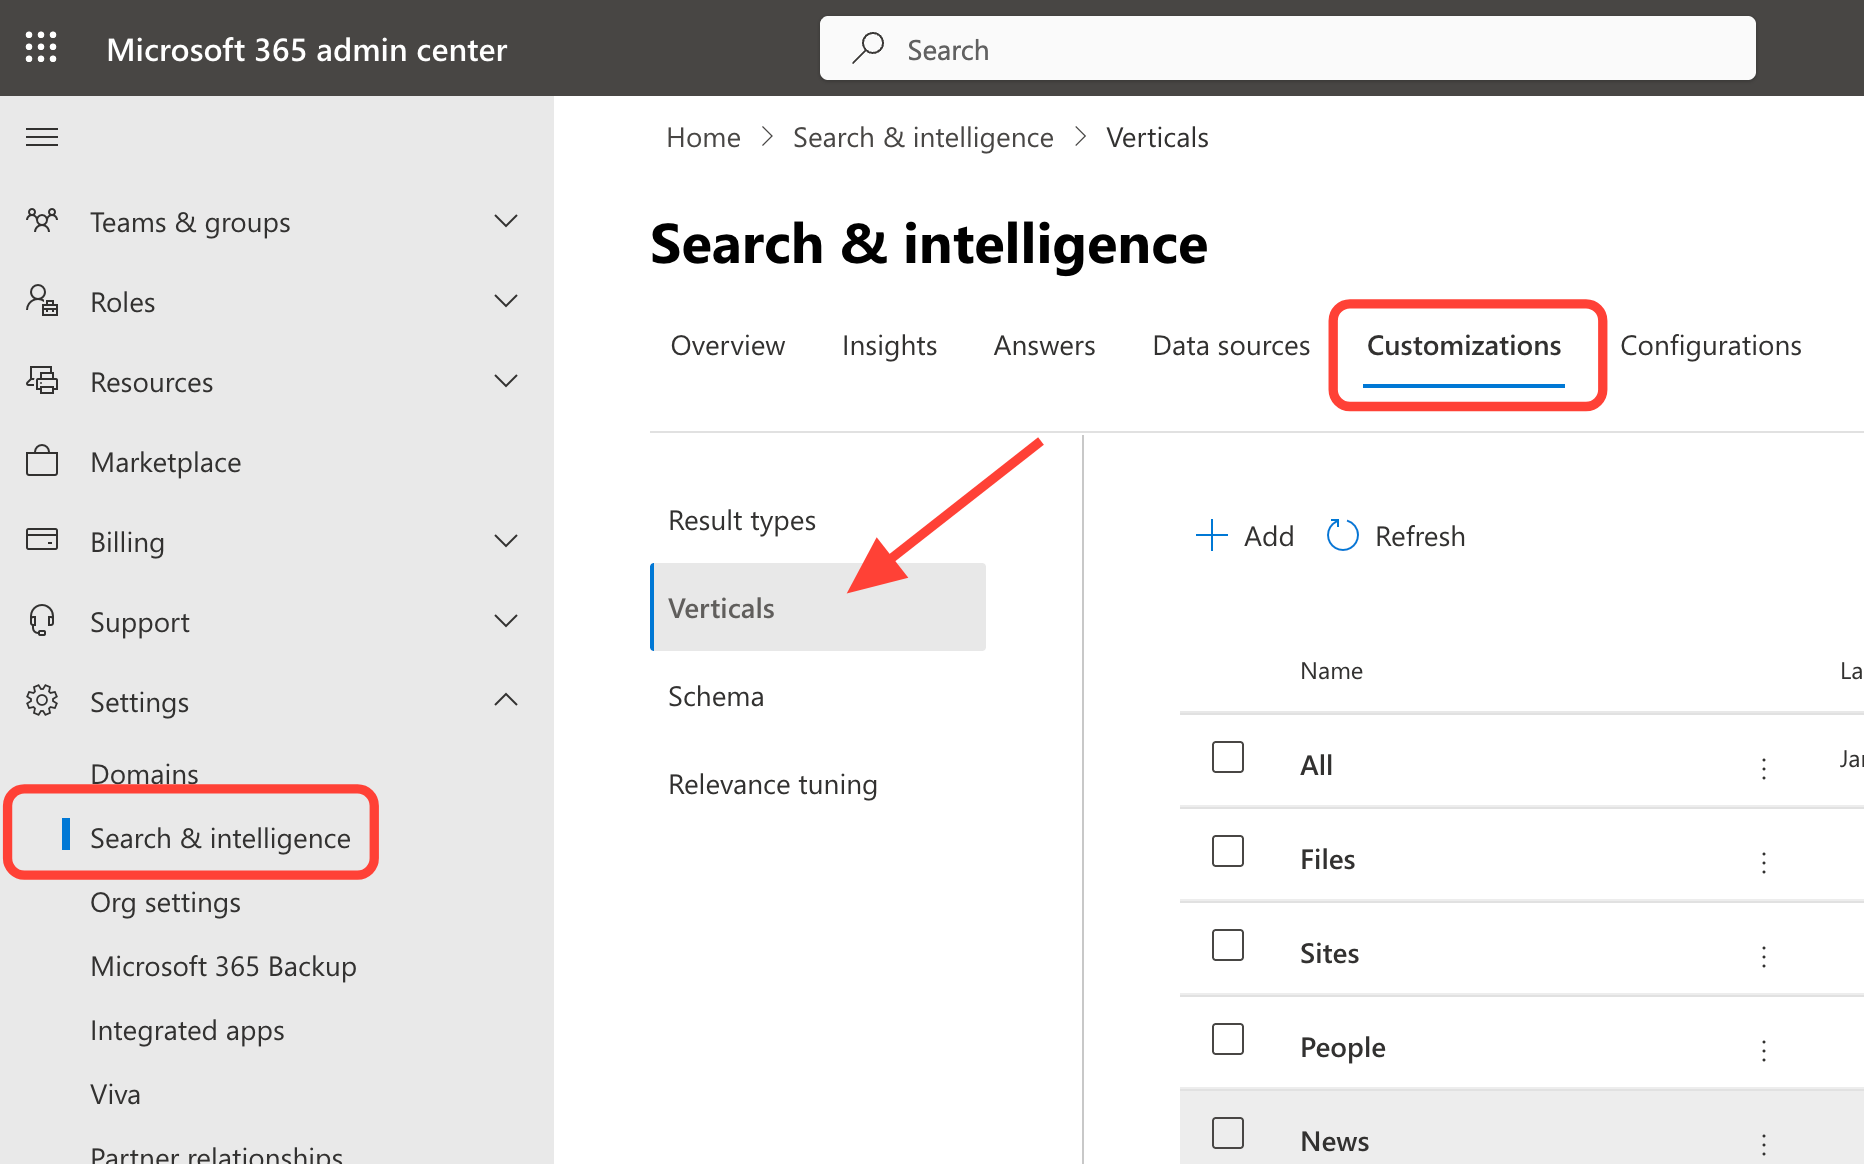
- Navigate to Settings > Search & Intelligence > Customizations > Verticals
You will not configure a Vertical so that ScreenSteps content in the connector can be displayed in search results.
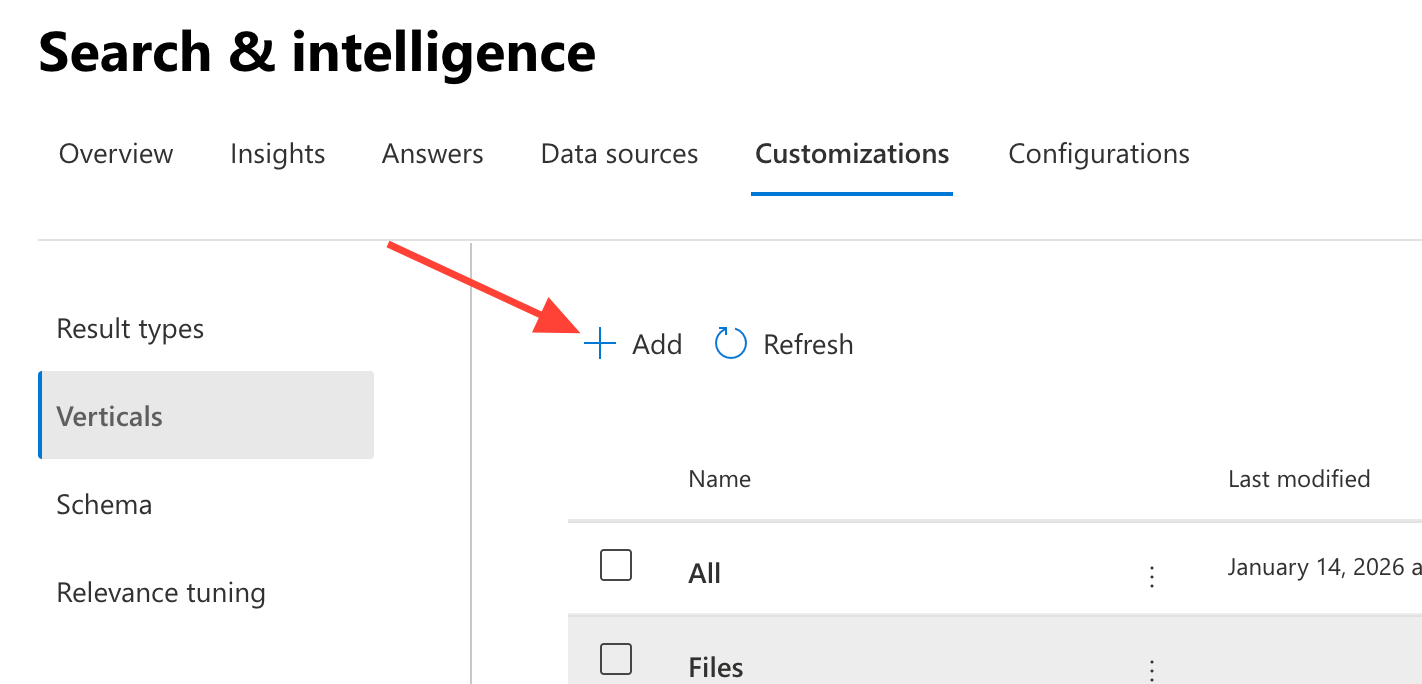
- Create New Vertical
Click the Add button
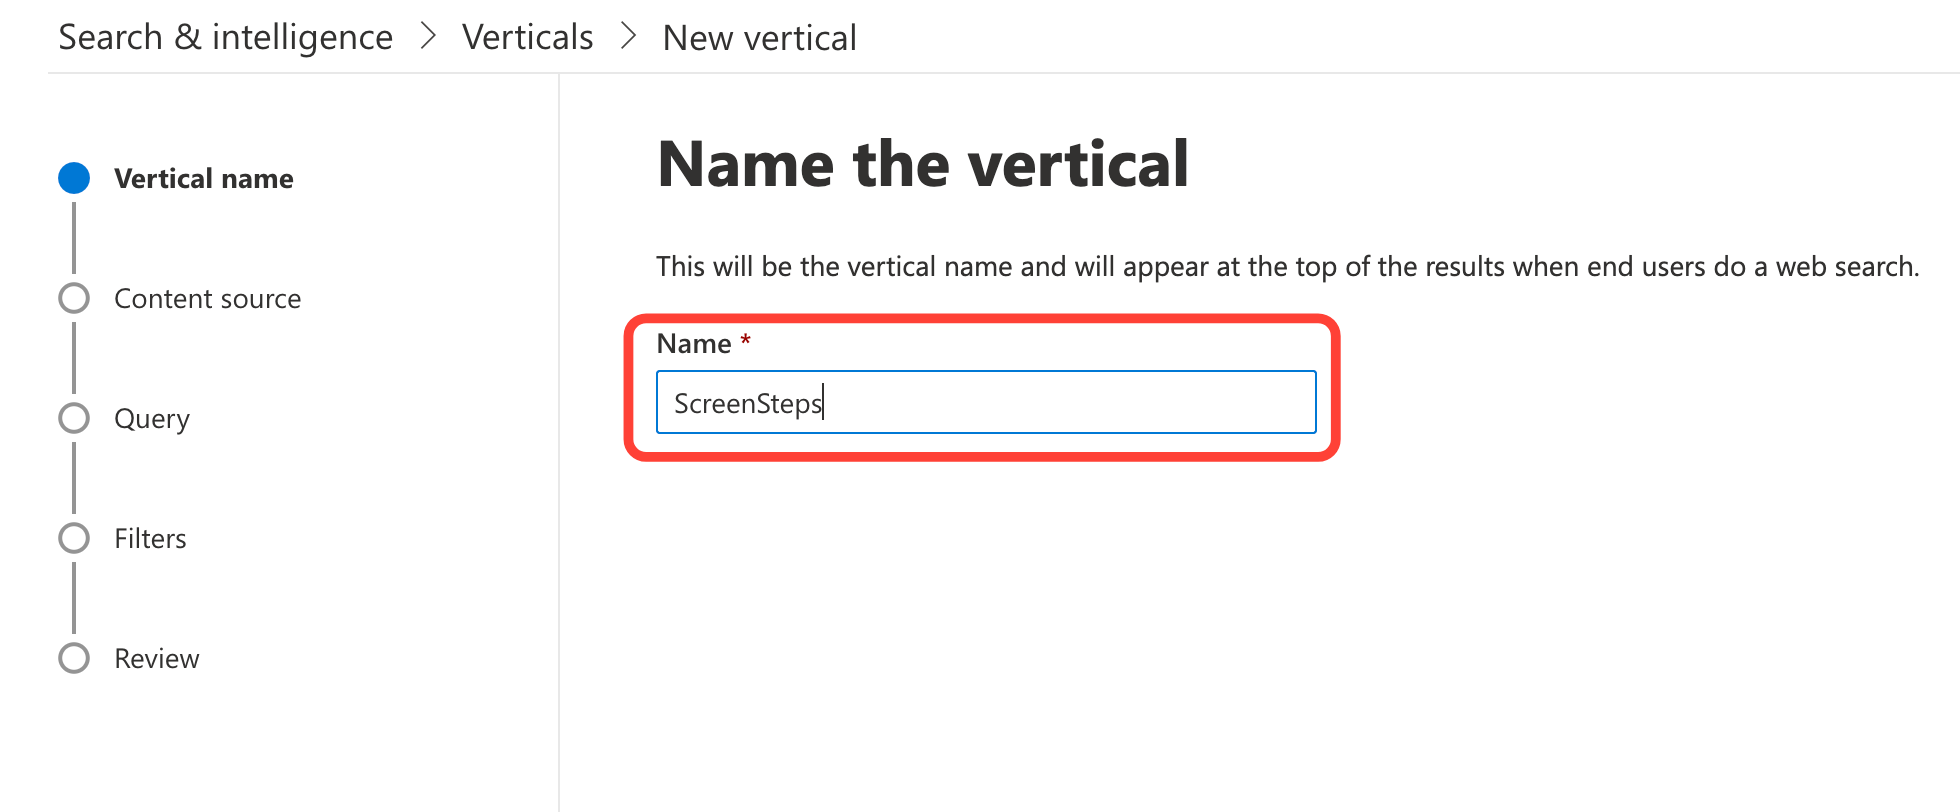
Enter ScreenSteps for the name and click Next
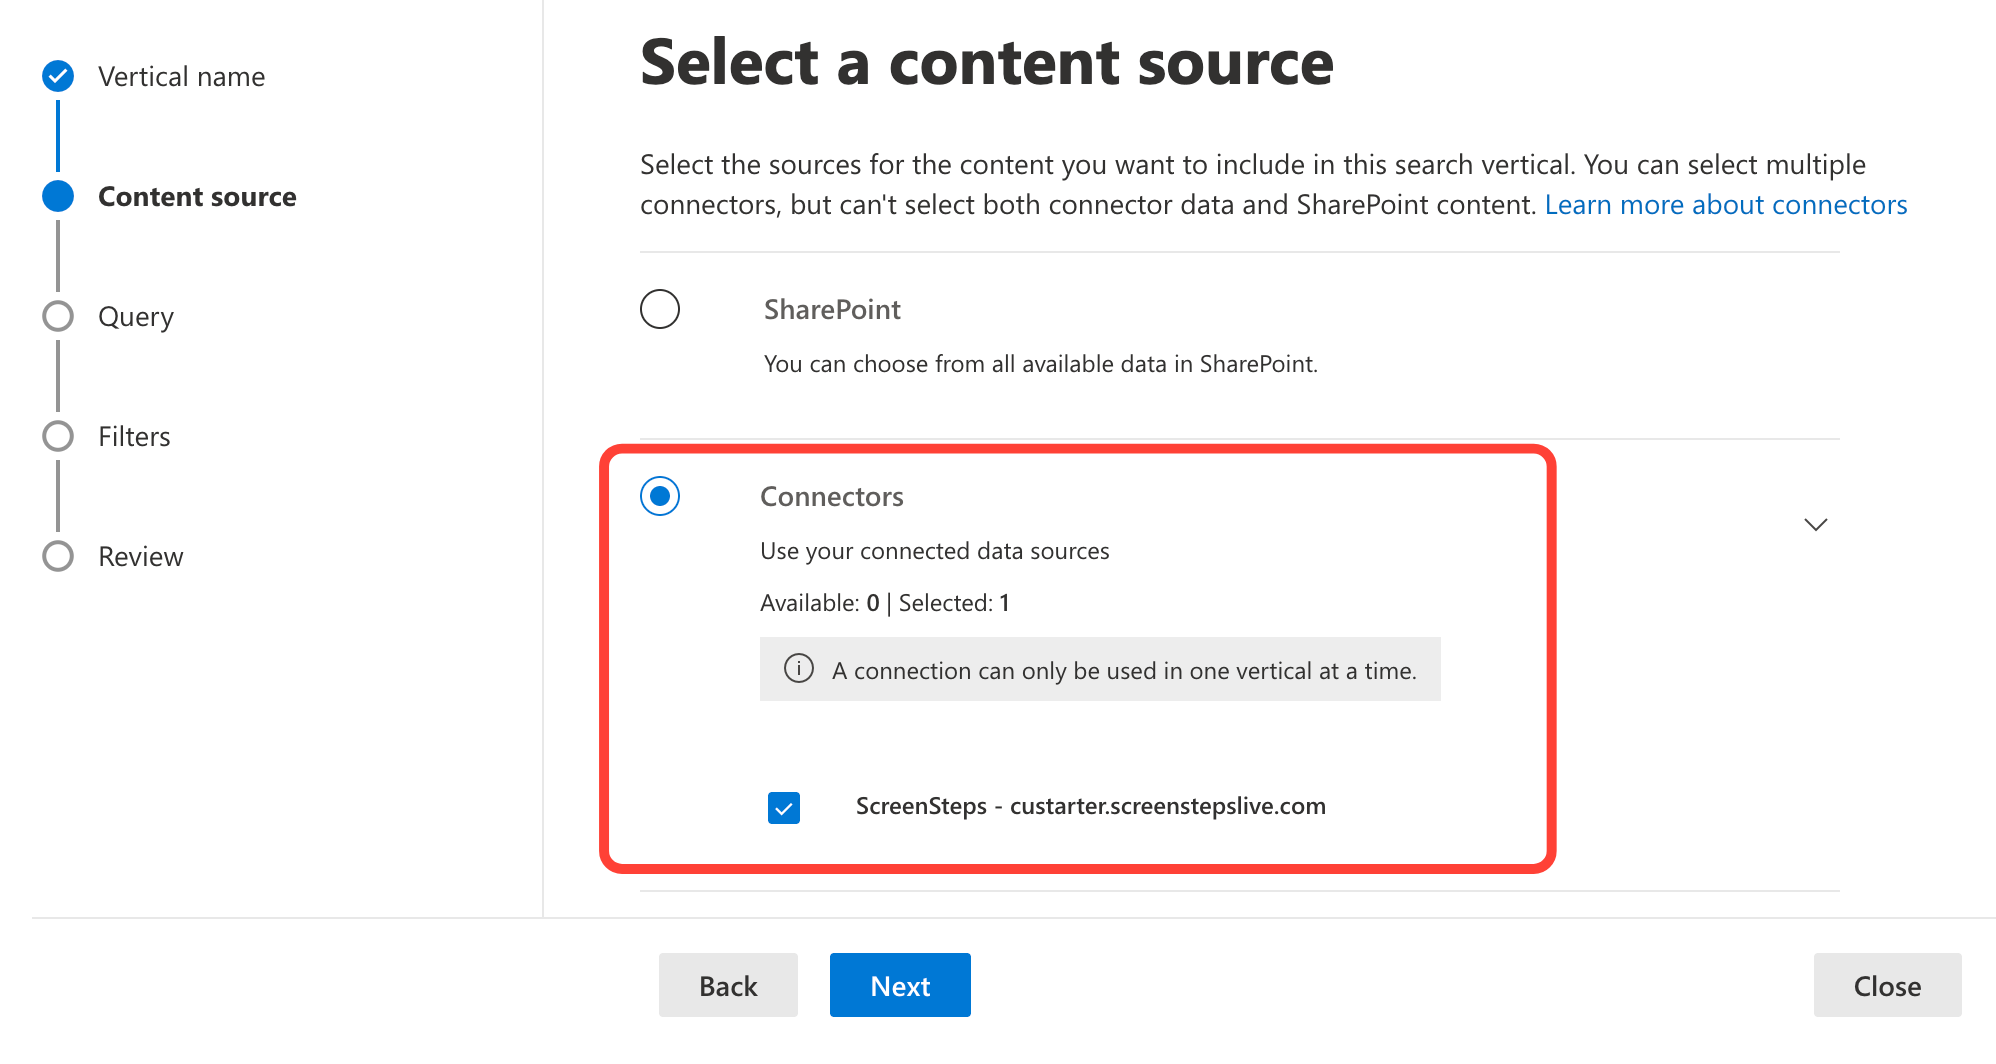
Select the ScreenSteps connector and click Next
- Click Next on the Query step as there are no changes to make.
- Click Next on the Filters step
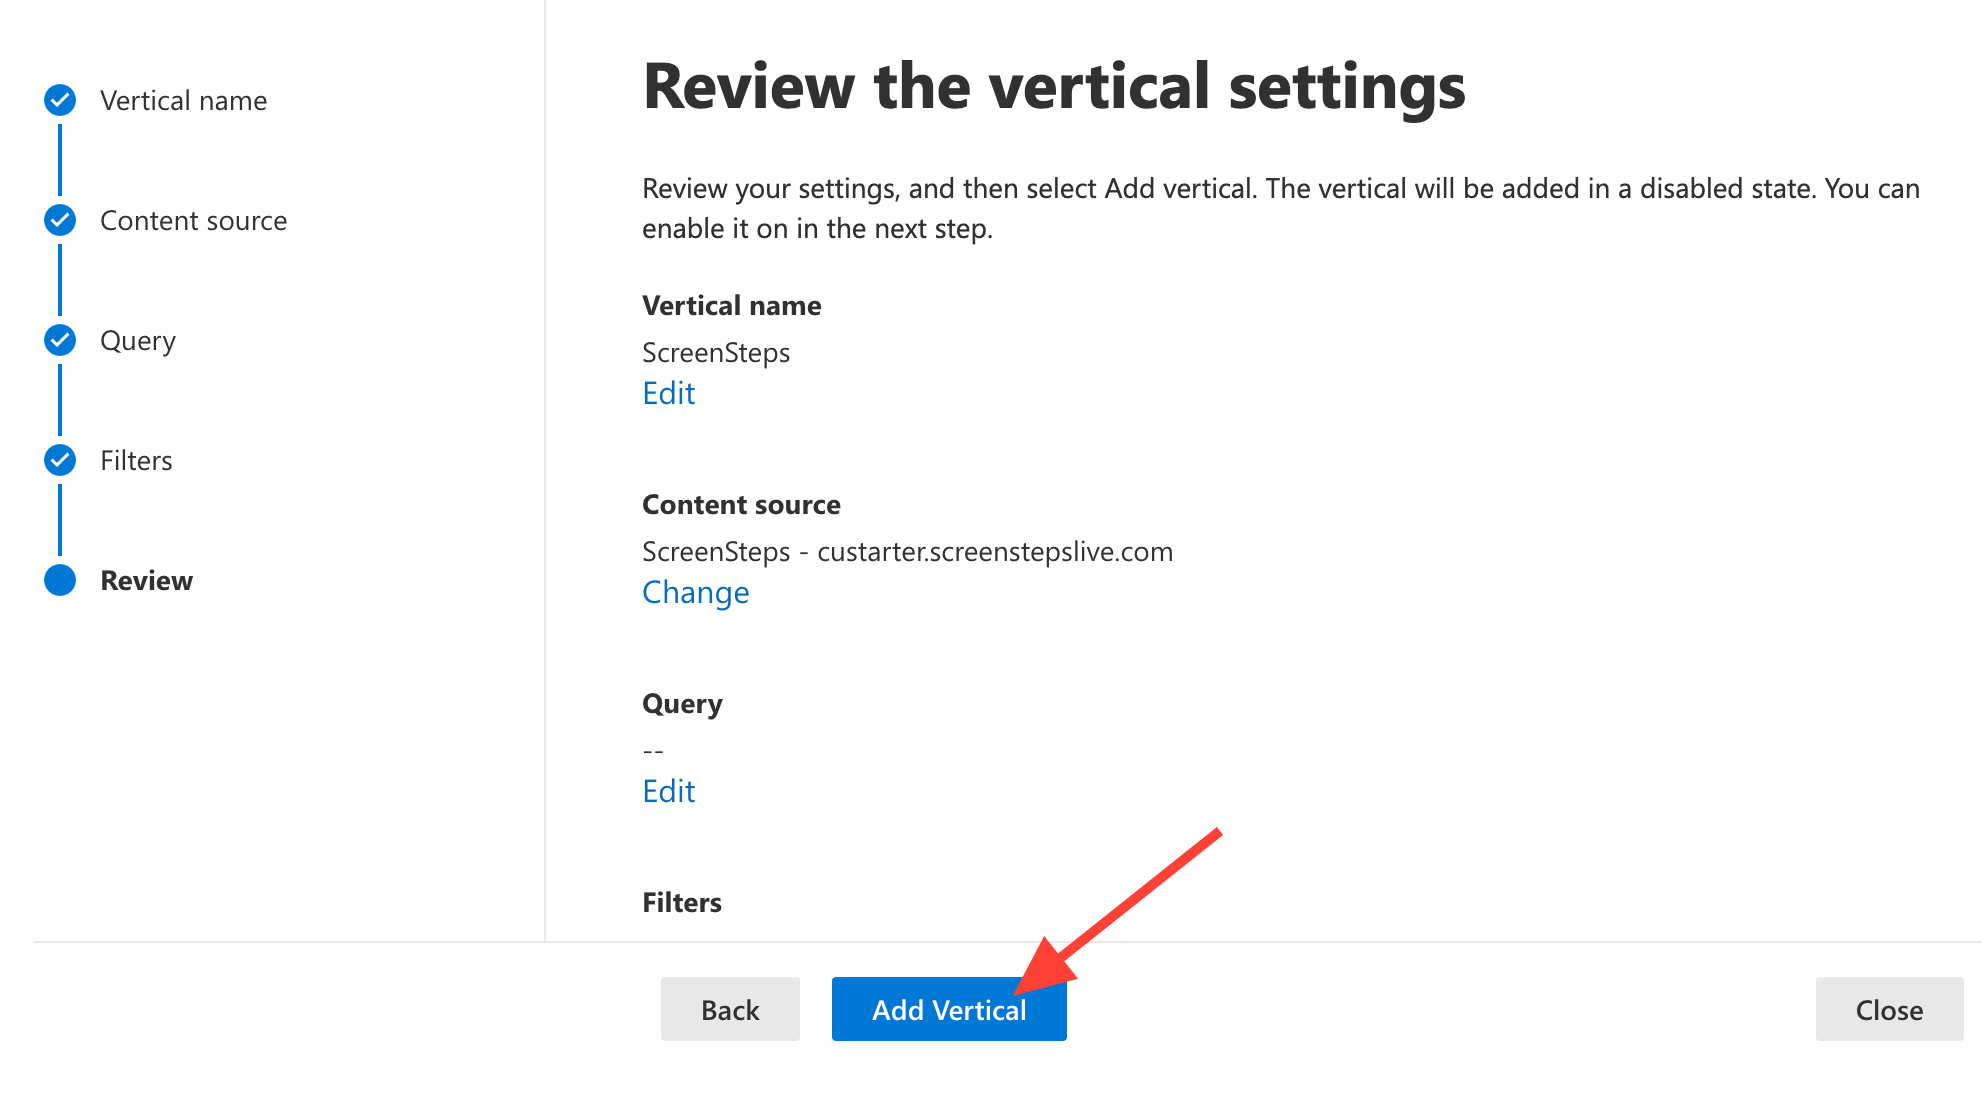
Click Add Vertical
Click Enable vertical and then Done

- Test at https://m365.cloud.microsoft/chat/
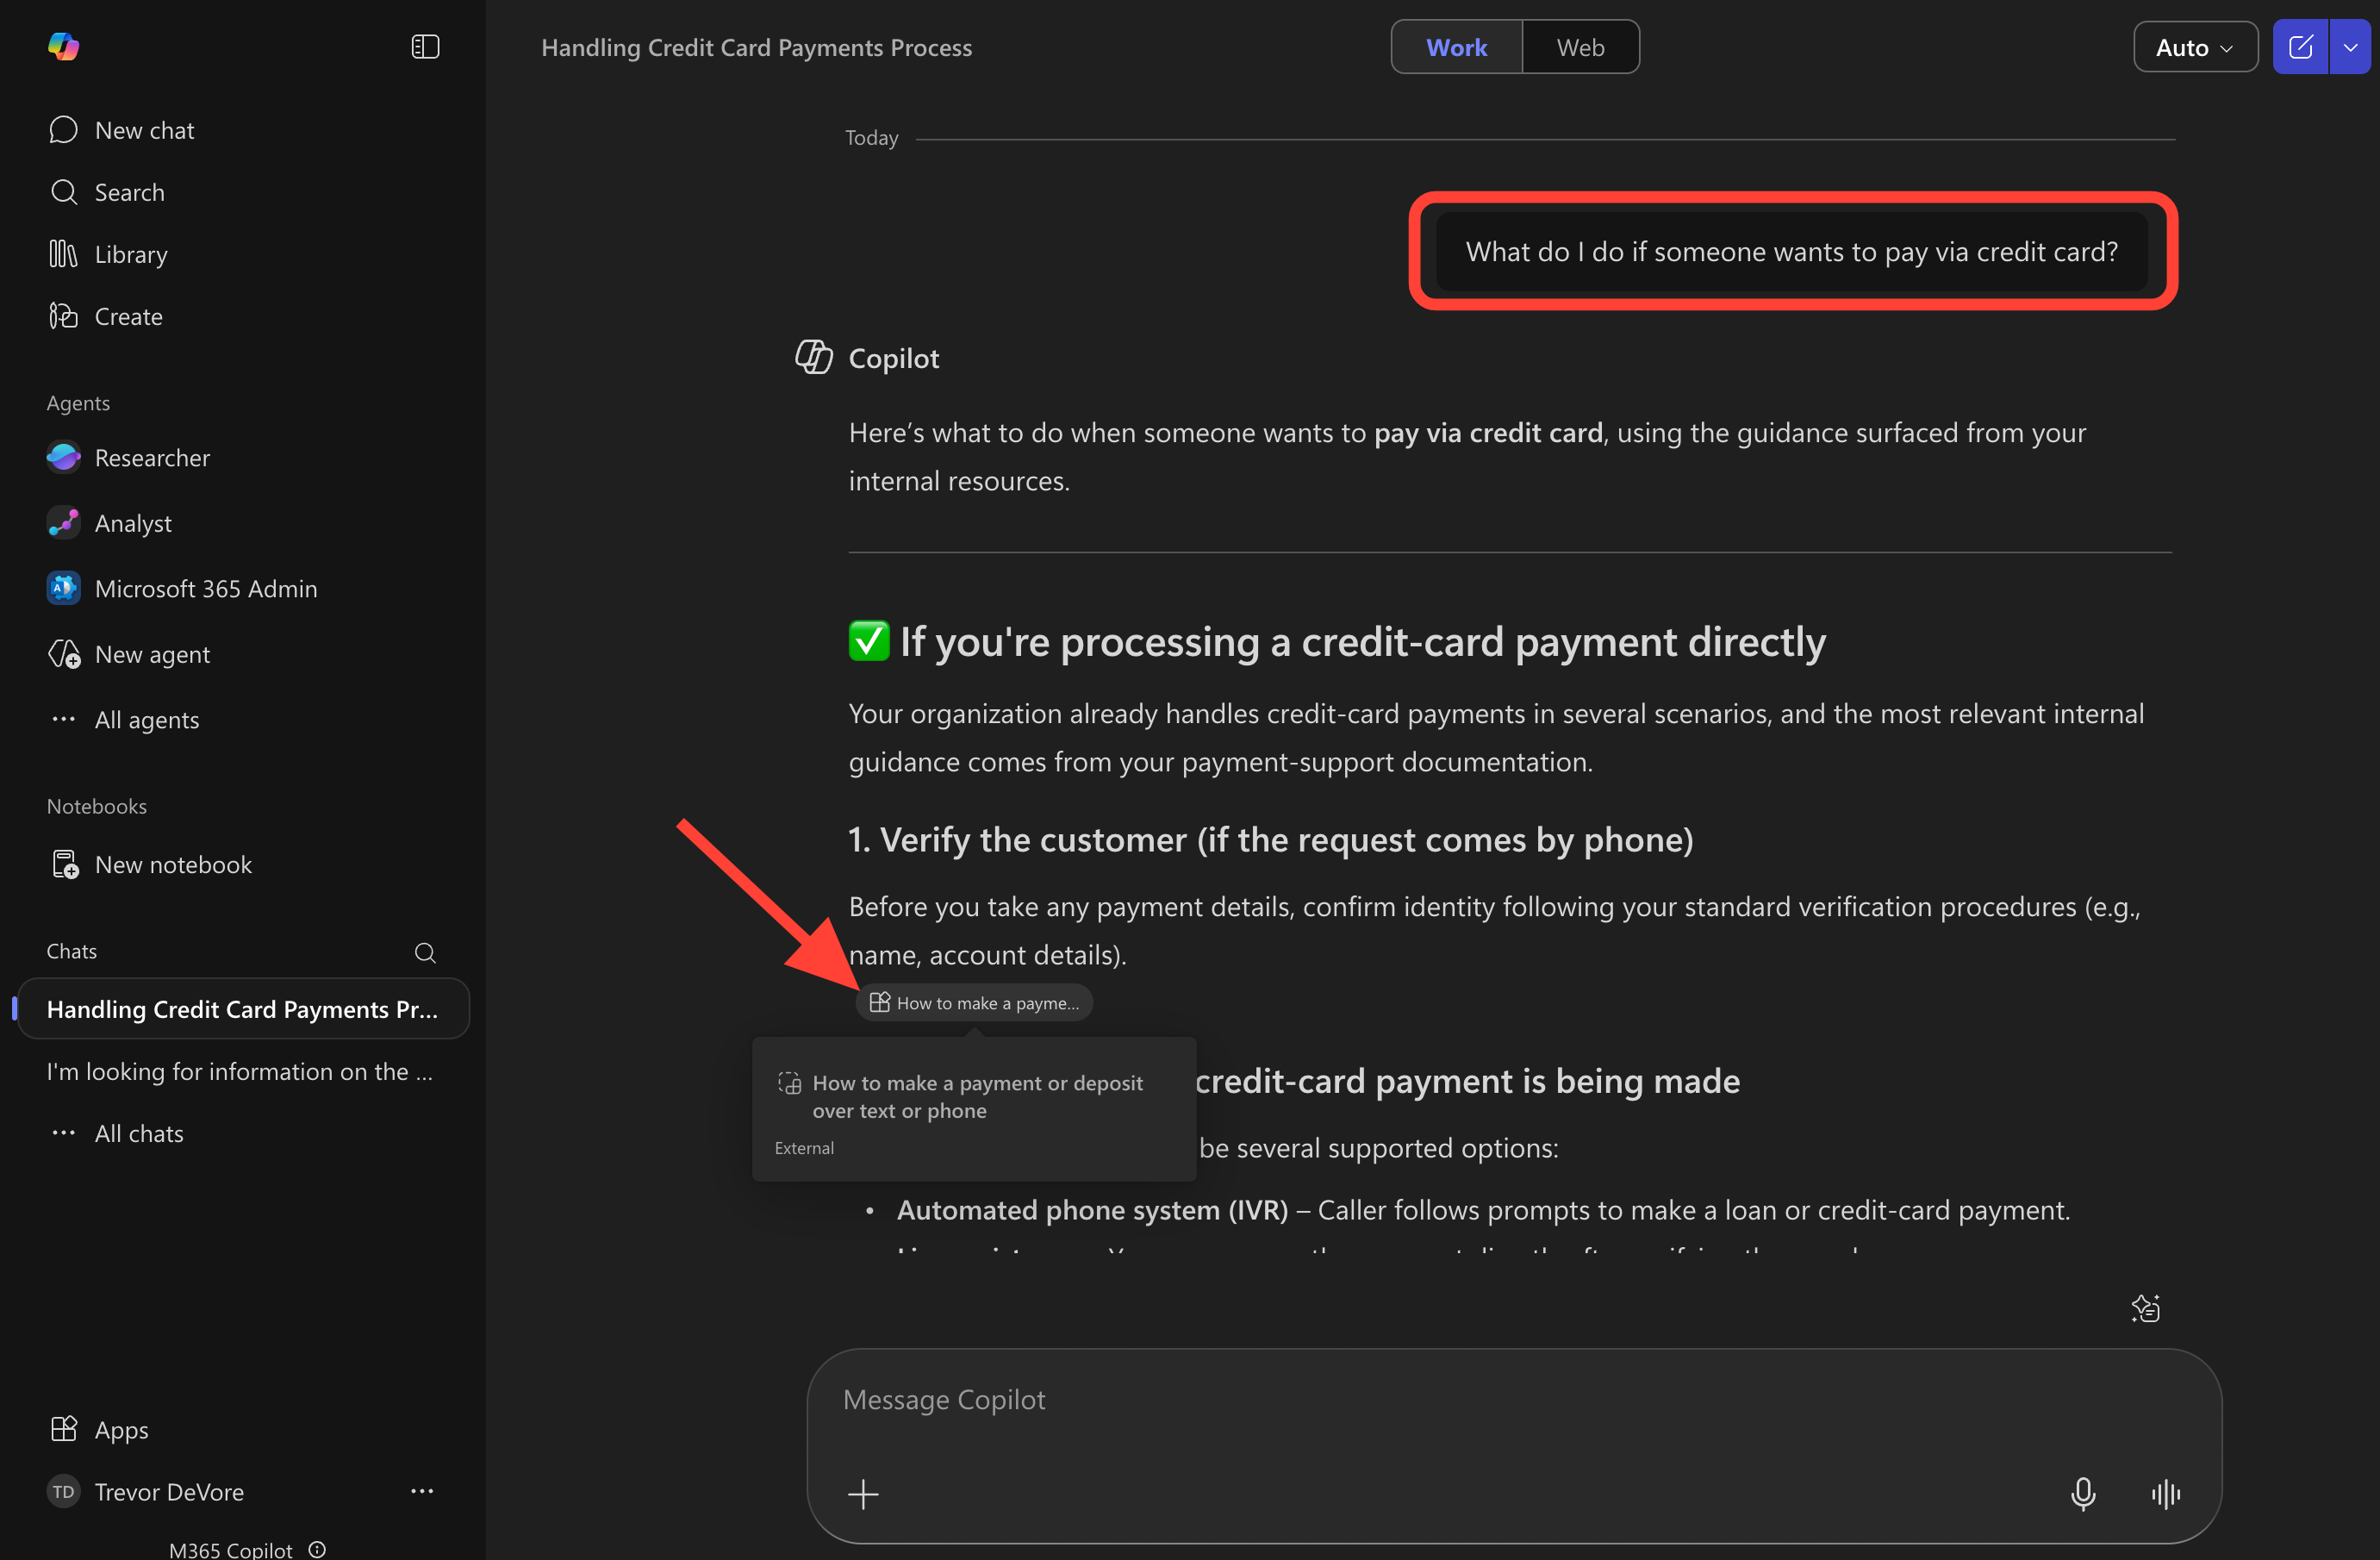
You should now be able to search for content in a chat. For example, in the following screenshot a Copilot was asked:
What do I do if someone wants to pay via credit card?
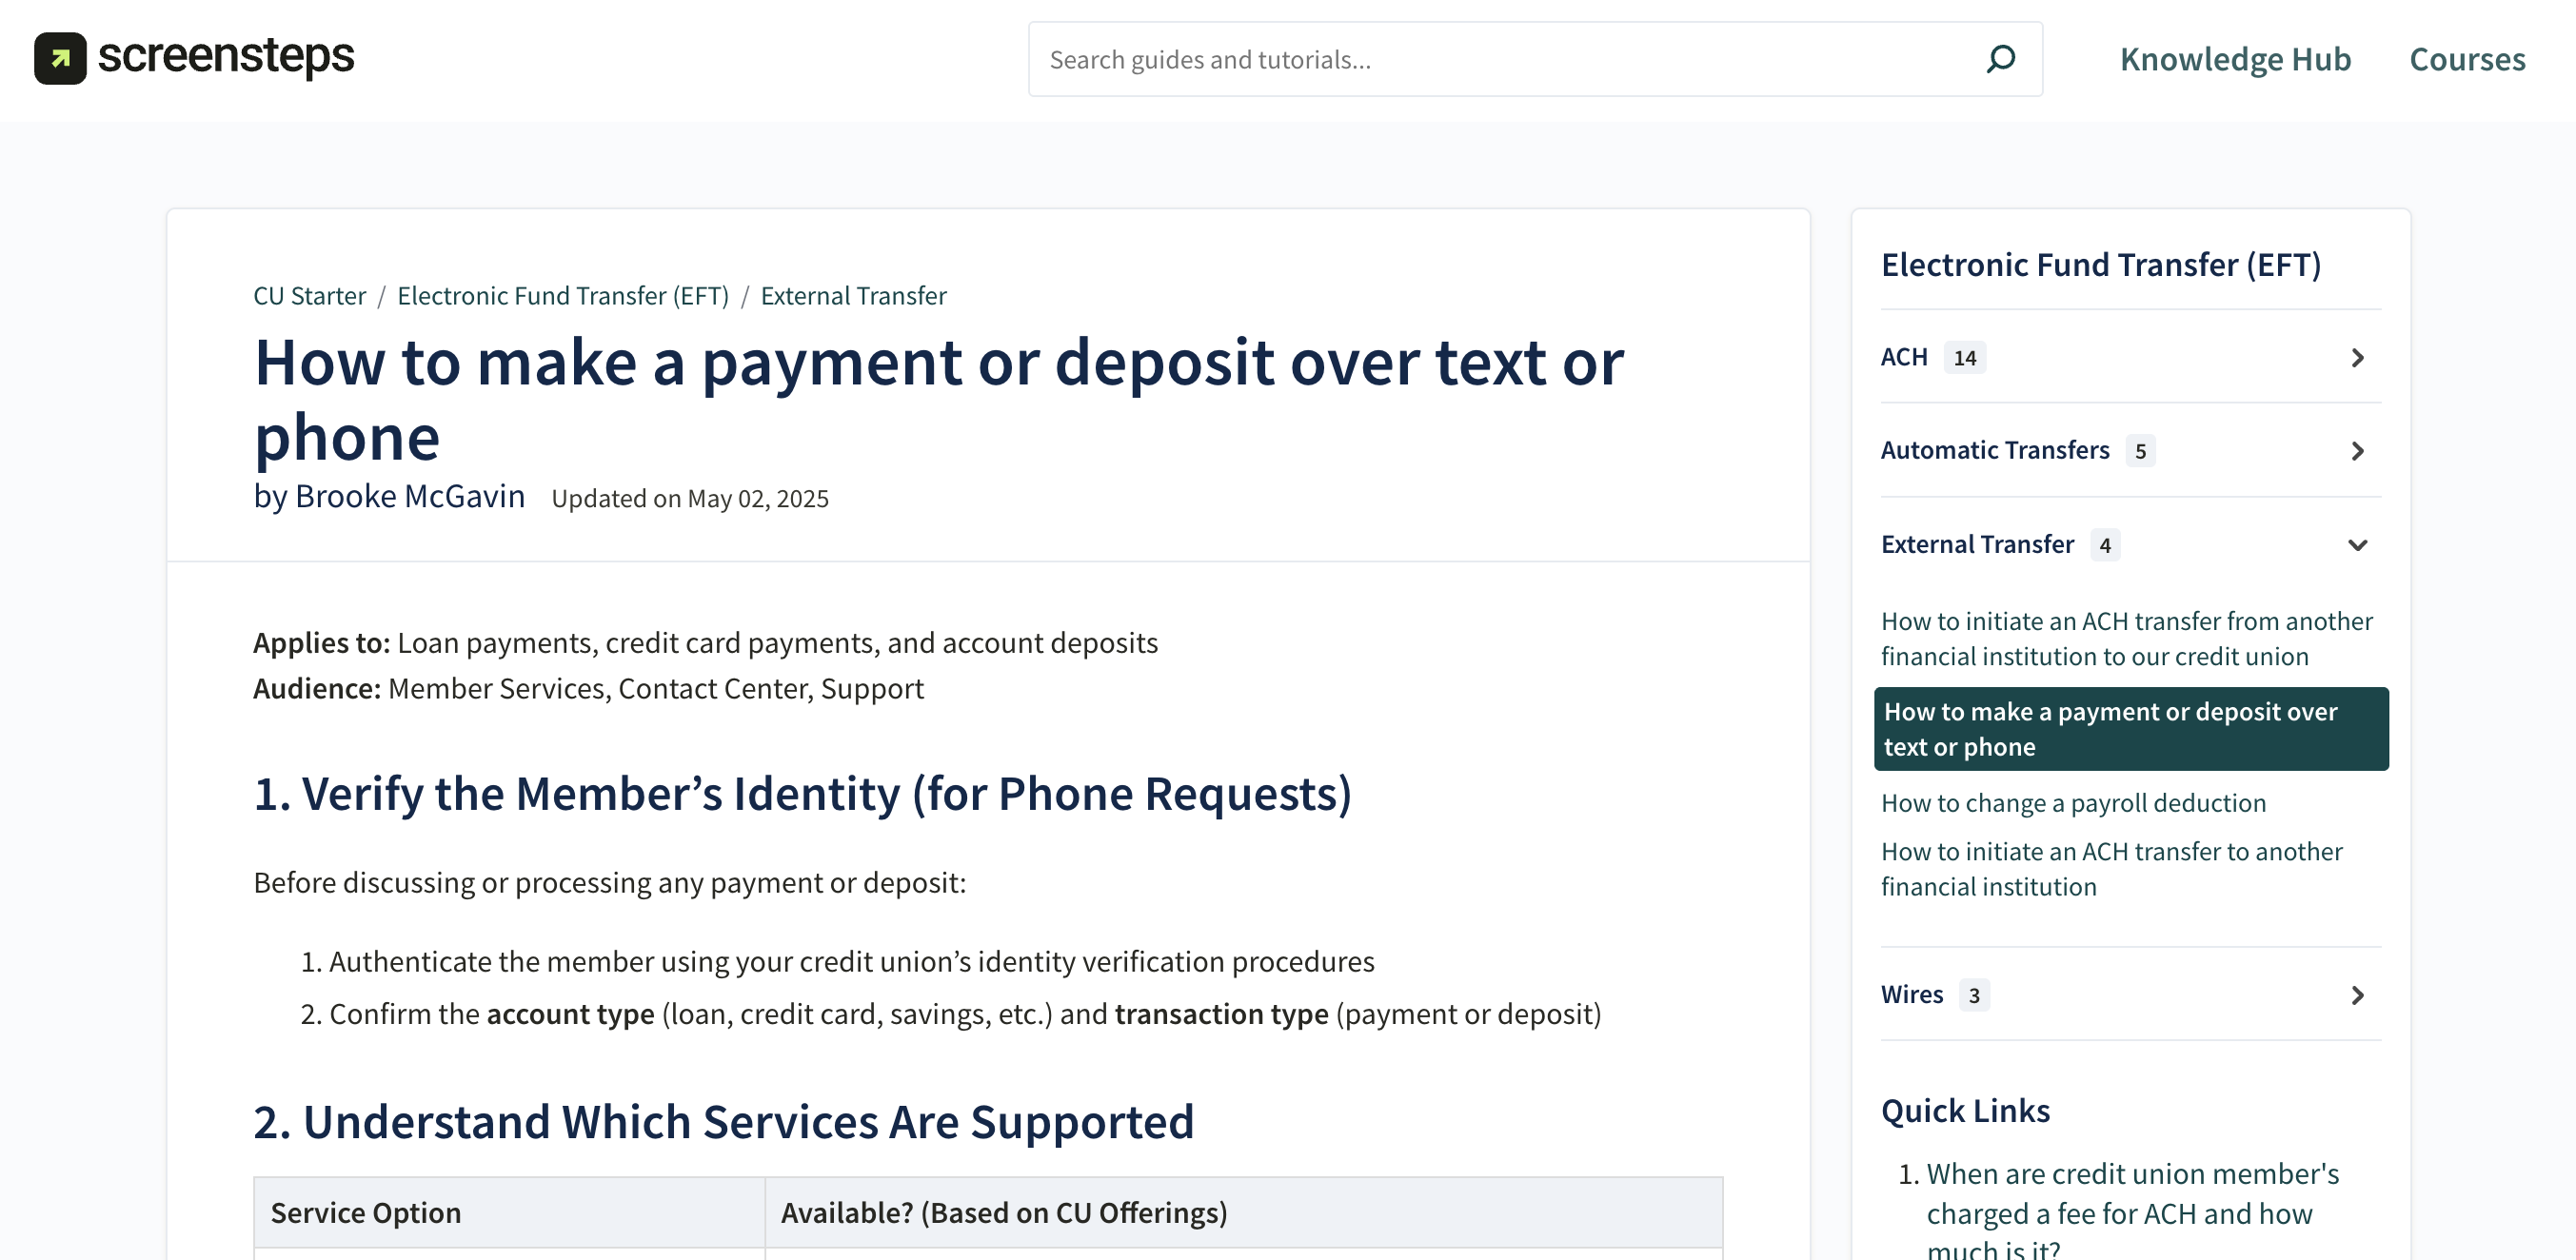
Because an article in a ScreenSteps article includes the answer, it shows up in the response that Copilot provides. Clicking on the reference will take you to the article in your ScreenSteps knowledge base.
This is the article that the reference link points to:
Configuring the Microsoft 365 Copilot integration
Updated on